HOME

May 8, 2010

iPhone App Review: Pano

I call this: phones,tech — Posted by KP @ 7:46 pm

I don’t usually do reviews of individual apps, but I feel like this one needs it, because it’s not just an app, but a way of taking photos that has specific applications for stage management that I find handy.

Pano ($1.99 on the App Store) is a photo-taking app that automatically stitches together multiple photos to make a panorama.

Now of course you could do this with any camera and then spend an hour painstakingly putting the photos together yourself in Photoshop, but this app will do a surprisingly good job in about a minute, all right there on your phone. The convenience of it is that even if you have the skill and software to make your own panoramas, this app allows you to do it almost as fast as taking a regular picture, which allows you to use it in situations where it otherwise wouldn’t be practical, such as when you need to take a picture and email it to someone right away. Instead of making do with one or more regular photos that don’t capture everything you’re trying to show, you can give the big picture with a panorama.

Here’s a purely work-related example:

Before beginning rehearsal on Romeo and Juliet, Nick and I flew out to Minneapolis a few days early and set up the rehearsal room. Our director would not arrive until the night before rehearsals began, so to give her an idea of what the environment would be like, and a chance to request any changes, I took this panorama and emailed it to her. I didn’t do the greatest job, as you can see the room looks a little wiggly in the middle. I have been trying to get better at positioning myself to avoid distorting the image. Sometimes you don’t have the luxury of time or movement to set up the perfect shot, but in those cases Pano will still do a decent job of letting you snap off a few quick pics. It might be obvious it isn’t one photo, but it will still capture the idea of the space better than a single photo.


Here’s an example of why panoramas aren’t just for landscapes and wide open spaces: on tour this year we were big fans of playing Wii on our bus, and I wanted to take a picture of this. With the slide out, the bus is 10 feet wide, which is not usually very wide for a picture, but in the cramped conditions of a bus it’s hard to stand back far enough to get everything in the shot.

Another use I’ve found that’s kind of related to the above is that a panorama can be better at showing things the way the human eye perceives them. I had a really cool calling desk at one venue on the road, and just taking a flat picture of it wasn’t capturing all the detail. After several attempts, this is the best panorama I came up with:

If you look at the bottom edge of the Macbook you’ll see an imperfect stitch where it gets a little wavy, but for the most part it looks like a single image.

Basically what I’ve taken to using this app for is to get a better picture of something when all of it won’t fit in one frame. You can also get more detailed shots because you’re getting closeups of say, four sections of something, rather than standing back and getting a smaller-resolution photo of all of it.

So how does it work?

Now that I’ve told you all the reasons you should want this app, here’s how it actually works. As an example, I will take a picture of part of my desk.

The first shot is easy, and every shot after that will show you a transparent slice of the edge you’re trying to align the next photo with:
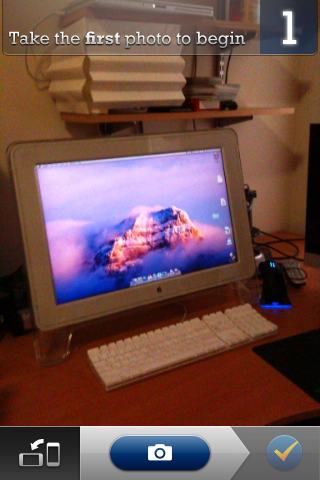
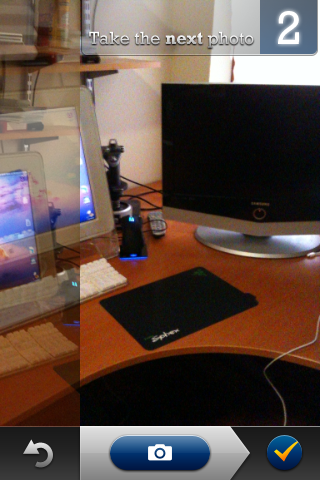
The hardest part is putting yourself in the perfect position to get the next shot lined up with the guide from the previous shot. You may not notice you’re moving, but every slight adjustment in all three dimensions changes your alignment, and even when you think you’ve got a couple distinctive parts of the image lined up perfectly, there may be one thing that you didn’t notice was all out of whack, especially when dealing with things that are varying distances from the camera.

Here’s an example of the final product:
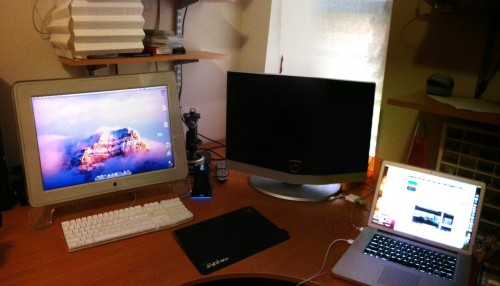
The one thing I really messed up is the iPhone cable coming off the computer. The keyboard on the left has a slight waviness to it near the arrow keys as well, though that’s less noticeable. I could fix either of those things in Photoshop if I really cared about making it look perfect, but if my goal was just to show somebody what my desk looks like, it won’t hurt their understanding of the photo as a whole.

You also have the option of taking your photos in portrait or landscape. In the example above I used portrait mode, but the first photo of the rehearsal room was done in landscape. It just depends on what you’re trying to include and how many photos you want to take to cover that area. You can also use pano to include more vertical space than you could otherwise, as shown in this quick-and-dirty thing:
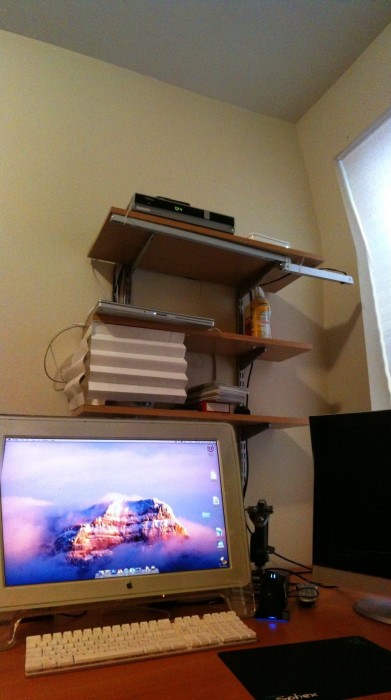
I have two complaints:

  • If you are interrupted while constructing your panorama, and have to leave the app, it will not save your progress, so you have to start over with the first shot.
  • The camera doesn’t support the advanced tap-to-focus features of the 3GS, which gives you less flexibility in getting a clear shot than you would get with the default camera app. Not sure if this is a limitation Apple places on third-party apps, or an oversight from the developer, but my guess is it’s the former.

What I find most useful overall is that at the most basic level, I am in the business of transmitting information. Pano allows me to convey more information in a photo than often is possible with a camera alone, which gives the recipient a greater understanding of the situation in question.


Review: Razer Sphex Mousepad

I call this: computers,gaming,tech — Posted by KP @ 6:10 pm

I’ve had this mousepad a really long time, and never got around to reviewing it. Which is probably the better way to write a review, after you’ve had a product for like a year, and actually have experienced it in many different situations.

The concept of the Sphex is that it’s really, really thin. It’s about the thickness of a piece of paper. After much scientific study with my fingertip, I have determined it’s actually the thickness of two pieces of paper, but I buy cheap paper. If you have some real quality stock of paper, it might be just one. The point is, it’s so thin as to be almost imperceptible on your desk. The other very nice feature is that Razer has priced it very well. It’s only $14.99, which for a gaming-grade mousing surface is about as cheap as they come. Knowing Razer’s penchant for making high-quality gaming devices, but with prices that reflect their quality, when I first read about it I figured it had to be at least $30. I was very impressed that they made it so affordable.

It’s Thin

There are several advantages to how thin it is. It feels a lot less constricting when playing, because the edges of the pad don’t get in the way of your hand. The pad is relatively small for a gaming pad, but I don’t use really big hand motions so it’s fine for me. I also love it because I tend to move things around on my desk, while working and while playing. Sometimes I want to put my laptop down on it, or overlap my keyboard on top of it. Definitely when gaming, I sometimes need to place my joystick and throttle on the portion of the desk normally reserved for the mouse. In all of these situations, I can place anything over it without creating an unstable surface because it’s so thin. It’s more like a differently-texture section of the desk, rather than a separate object. Right now while typing on my laptop, my left forearm is resting on the corner of it. With a regular mousepad that would be annoying, and I’d need to shove it out of the way, but I don’t even notice it.

Being a Razer product, naturally it’s fine-tuned for gaming, and the surface is made of the proper texture to provide good tracking for optical and laser mice. The texture thing can be a personal preference. Some people like their mousing surface really smooth for quick movements, some people like more control, so a more pitted surface that slows down the mouse but allows the sensor to more accurately track its position is better. And then there are those who like soft cloth mats for lots of control, but this is not that. It definitely feels like a hard mat, and leans a little more to the “control” type of texture, which I like.

Because it’s so thin, there’s no room for rubber or anything to keep it in place, so the entire mat is covered in a gentle adhesive. It arrives with a plastic backing which peels away. There’s a little tab on the side of the mat that is not sticky, so you can peel it up easily to move it. The adhesive is not too strong, just enough to keep it from going anywhere when pressed onto your desktop, and is intended to be reusable.

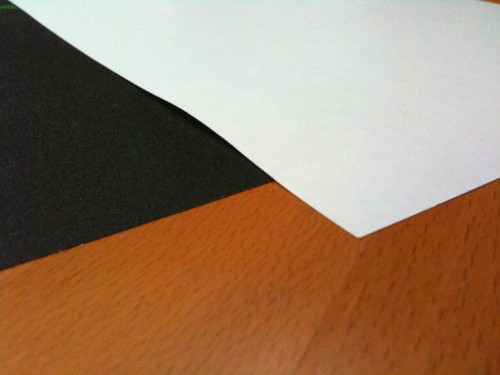
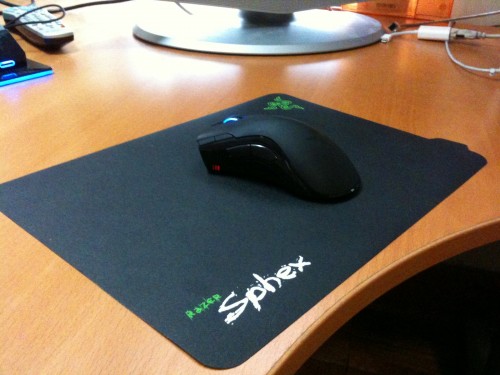
Here is a picture of the Sphex vs. a piece of paper:

Portability

I always tour with a mousepad. First of all, I’m just that kind of gamer. I’m aware of the impact my mousing surface has on my gaming, and I want my favorite surface with me all the time. Also, in a hotel you never know what kind of desk you’re going to get from day to day. It might be something really inappropriate, like glass, in which case you’ll probably wind up mousing on top of a brochure about historic Chattanooga or something.

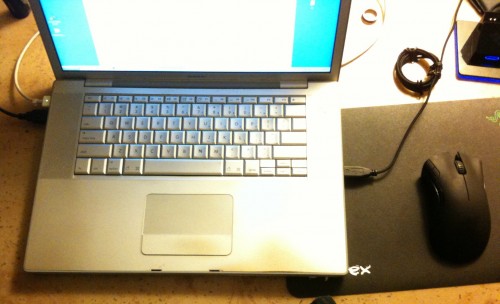
Speaking of Chattanooga, I found this picture that I inexplicably snapped there, of my laptop set up for gaming. The table wasn’t even the kind of work-friendly desk hotels usually give you. It was just a round table, that tapered off quickly outside the photo frame. In this case I am demonstrating how handy it is to be able to overlap your computer (or keyboard, in the case of a desktop) with the mouse pad when working in tight quarters. Incidentally, it also demonstrates why I’m so glad my new Macbook Pro has both USB ports on the left.

But mostly, the main reason I always bring a mousepad is to protect the mouse, which is the real investment. A $125 mouse that’s treated like a $20 mouse will start to perform like a $20 mouse when it gets all scratched up or used on a dirty surface. So I always make sure before I use the mouse that the mouse pad is perfectly clean and smooth, and nothing that can cause damage (food and drinks, objects that could scratch it) is ever put on the mouse pad.

Using a mouse pad also protects the surface from getting scratched by the mouse (which is sort of like saying that not keying a Ferrari protects the keys from getting paint on them), but especially with heavy gaming, it’s good for your furniture, and respectful of other people’s furniture if you’re in a hotel, dorm room, or any other place that’s not yours.

I both love and hate touring with this mat. First of all, I love it because it’s so light. For the purposes of packing, its weight is completely negligible. My previous mat was backed in aluminum, which added a little bit of weight and rigidity to the packing of my backpack. It wasn’t a huge problem, but replacing it with something weightless and flexible was a big improvement. Obviously this is a precision surface and you don’t want to pack it somewhere where it will get crushed or bent, but it has a little bit of give to it, and that’s helpful sometimes. I usually pack it in the section of my bag intended for papers and stuff — most laptop bags have a file-holder divider for this purpose. I’ve usually got a few papers in there (pay stubs, hotel receipts, schedules), and will pack the Sphex between these papers so it’s got a little protection against anything that might rub against it in the bag.

The one drawback for touring is the need to use the adhesive. I kept the plastic backing around because I knew this mat would need to move a lot. So whenever I travel with it, I try to make sure both sides are free of debris, and then carefully align the plastic with the back so all the sticky parts are covered. After many travels, the adhesive loses a lot of its stickiness. I notice it mostly in the fact that the plastic will no longer stick to all of it. If you look closely in the photos above you can see places where it’s lifting off the desk a tiny bit. There’s still enough adhesive on the mat to keep it from sliding around, but there are regions of it that have become worn down, either because the adhesive came off on the surface it was on, or it has attracted some dirt. I should mention that occasionally it will leave a some residue on a desk, which can be cleaned off, but on my home desk sometimes that takes a lot of effort.

However, there is one way to help this problem, in that the mat is designed to be washable. Yes, you can wash it with water and a little soap, and it will clear the dirt off the adhesive side, but I find that it doesn’t go back to being as sticky as when it was new. I figure that’s probably a result of some of the adhesive actually coming off, rather than being covered in dirt.

Longevity

My recommendation on moving around with it is that it is definitely reusable, and would be perfectly fine for moving a couple times a year, but if it’s your job to be in a different city every day, or you go to LAN parties where your rig is constantly being set up somewhere new, you might get frustrated by it. However, if the prospect of gaming on such a thin surface seems really exciting to you, it might be worth it. Also, the price is low enough that if you really care so much about your gaming experience, it’s not going to break the bank if you have to replace it eventually.

Actually, if I was really going to be thorough, it would be a good idea to have one that stays at home in perfect condition, and one for travel. Any bumps on a mousing surface — either on the mouse skates or the pad — create jittery movement for your game, and a tiny particle of dirt stuck under the pad could create a noticeable bump when playing. I always do my best when re-applying the pad to make sure the table is perfectly clean, and there’s nothing stuck to the adhesive, but the more it moves the more chances there are for imperfections.

Summary

Overall this purchase is one I am completely happy with. The only drawbacks to it are a result of my lifestyle not really being suited for the way the mat works, and even then it works pretty well. I’m not sure if I could ever deal with a mouse pad getting in my way again. It’s got all the advantages of mousing directly on your desk, but with the advantages of using a mouse pad as well: you won’t damage your desk or your mouse, and you have a surface designed to help your mouse track better.