HOME

March 30, 2012

iPad 3 Review

I call this: phones,tech — Posted by KP @ 8:19 pm

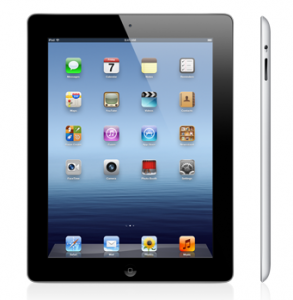
On March 16 I received the new iPad, which I, and presumably everyone else in the world, will refer to as the iPad 3, because as I learned in nursery school, 3 comes after 2. Although sometimes in Apple-land, S comes after whatever the previous thing was. But let’s stick to integers.

I’ve had a little over a week to get to know my first iPad — this is important, that this is my first iPad. I have said in years past that I wasn’t quite sure how an iPad would fit into my workflow, and I’m still not completely certain, except that I’m much surer now that it will be useful somehow than I was when I wrote a pseudo-review of my Dad’s iPad back in 2010.

Choosing the Model

I got the 4G version instead of wifi-only, even though I expect to use it almost always on wifi. My reasoning is that I can’t really grasp all the ways I’ll want to use it, and I figured spending $800 and regretting my choice would be worse than spending $900 and possibly having a feature I don’t need. Also, I found out after my purchase that the wifi-only models don’t have true GPS, just the ability to use nearby wifi networks to guess your location. So that’s another bonus of the 4G that people should be aware of.

Choosing the Carrier

When the iPad went on sale for preorders, the carriers weren’t even acknowledging its existence, so I took a wild guess based on their plans for the iPad 2, and went with AT&T kind of by default, since it would match my iPhone. After the iPad had been on sale nearly 24 hours, AT&T and Verizon bothered to announce their data plans, so people could make a more educated decision. Their pricing is different, but in a way that might be better or worse depending on what you want. This graphic shamelessly stolen from the Apple website explains it best:
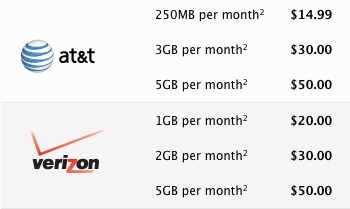
The big mystery, of course, was the “Who’s Going to Be More Evil?” game, which in my world for the last decade usually has something to do with tethering. Which mega-corporation, or both, would feel like charging by the GB and then charging again based on where the GB goes once it reaches your phone and is no longer on their network? This time, the winner is AT&T. Verizon is offering tethering at LTE speeds, at no extra cost. It’s almost like they want to help the customer by providing a service that costs them nothing… for free. AT&T caps off their victory not by announcing that they’re charging for tethering, but that they aren’t allowing tethering at all, for now. It’s just like their past iPhone plans, when they acted shocked — shocked, I tell you — by the carrier-related features the phone had, and took months to even announce how they would support them. Whenever they get their act together, I expect it to cost an arm and a leg.

It took a while for me to build up a good head of steam of burning rage about this, and I was more interested in the device itself than in the data plan I might never use anyway, so I didn’t undo the hours I spent trying to place my order on Apple’s website. After a week I was reading a post on Reddit asking if there’s a workaround for the AT&T tethering issue, and somebody was like, “just return it and get a Verizon one.” I’ve never been a big believer in returning a perfectly functional device, but I had forgotten entirely about Apple’s no-questions-asked, our-products-should-be-perfect-or-your-money-back, 14-day return policy. And my product was definitely not perfect. In fact, I was decidedly disappointed, and although it’s not quite Apple’s fault, they did take my money without being able to tell me what the terms of my service plan would be.

So after a week of ownership, I called up one of the local Apple Stores, and got lucky on the first try with a store that had the appropriate model in stock. I hopped on the train and in less than 5 minutes I was in and out of the store with a Verizon iPad. I had a nice chat with my salesguy about choosing between AT&T and Verizon on iDevices in general. He’s happy with his Verizon iPhone, and says that despite AT&T having better maximum speeds when service is good (which was my explanation for putting up with them), he finds on average he gets much better speed with Verizon because AT&T’s service is so often performing far below its capability. Or the capability of a 14.4k modem, for that matter. His one complaint with Verizon was the inability to use data while on a phone call, but that’s a non-issue with the iPad anyway.

I’ve just activated the data plan yesterday, and haven’t used it much except to test it, because I have no idea how quickly I’m going to use up my 1GB. I’m doing a three-week gig in April, so I started the plan just late enough that the job will fit within my billing month.

Here’s my speed test result:

Not bad at all. It’s better than a lot of people’s home internet, though of course the data cap kind of defeats the purpose.

Thankfully the plans offered by both carriers are very flexible. You can pay month-to-month, which is great for someone like me who works a different job (or not) often on a monthly-or-less basis, and may have a need for it sometimes and no need at all at other times.

I’m curious to see how often I want the 4G. The kind of places I’d need it are probably the same places I wouldn’t be inclined to take the iPad out in public anyway. It doesn’t seem to me like the kind of device I’d whip out anywhere. On a long train ride, maybe — I mean a train-train, not a subway. But I think it would be seldom enough that tethering to my phone wouldn’t be too much of an inconvenience (happily, tethering to the iPhone works just as you think it should — neither carrier seems interested in forcing you to buy two data plans). Unless I had a job where I’m spending hours every day in a place without wifi, I don’t expect much need for it, but I will see on my upcoming job if I find a lot of uses for it. It will certainly be better than any rehearsal studio’s wifi, although we’ll be at Pearl, and their wifi has always been good enough that I’ve never felt the need to tether and burn megabytes off my data plan.

The Hardware

As I said in my impressions of the iPad 1, these things are heavy. When I envision a world where we all carry Star Trek-like tablet devices to diagnose alien diseases or record our captain’s log, I picture them being a little lighter. Maybe not as light as my beloved Kindle 4, but I don’t really want to be conscious that I’m getting a forearm workout while I’m diagnosing a problem with the warp core. The iPad 2 is lighter than the iPad 1, but the 3 is a small step backward. The difference may be worth it, but before we knew what the iPad 3 was, besides the obvious retina display, I dreamed it would also be amazingly thin and we’d all be shocked that they managed to include the upgraded display as well as a thinner and lighter design, without sacrificing battery life.

I like to imagine there was a conversation between Steve Jobs and Jony Ive that went something like this:

Come to think of it, that's probably the conversation that concludes the design process of every Apple product.

So I guess I can cut them some slack. But not having had to stand around holding this thing for any extended period of time, I can’t say if the weight will be a deterrent to using it in some situations. I still use my Kindle to read on the train, because it weighs almost nothing in my bag, is less likely to be stolen, less likely to be missed if stolen, I find touchscreens more trouble than they’re worth for reading, and I find the eInk soothing to look at in a well-lit environment. However, the retina display is much easier to read on than other LCDs, and I have taken to reading in bed with the iPad, mostly because I like to read with the light off, and also I’m running out of room to keep all these devices by my bedside! The ability to sync the page I’m on between the actual Kindle and the app makes it pretty easy to switch between them at will. I just have to make sure I turn on my Kindle before I leave the house and let it sync because it’s wifi-only.

So, the retina display.

Have you seen one? Have an iPhone? It’s like that, only bigger. It’s like staring into liquid or something. It has less pixels-per-inch than the iPhone, but it still has more pixels than all but the most awesome of desktop monitors. I have no complaints. It’s gorgeous, and I never want to look at anything else. I feel vindicated that I refused to buy an iPad without one. I don’t think I’d ever want to buy another screen of any kind if I expected such a hi-res version to be available within a reasonable timeframe. I am not buying another MacBook Pro without one, though in light of recent rumors of hi-res icons in Mountain Lion, I suspect we will see one on the market long before I’m shopping for a new laptop.

Charging

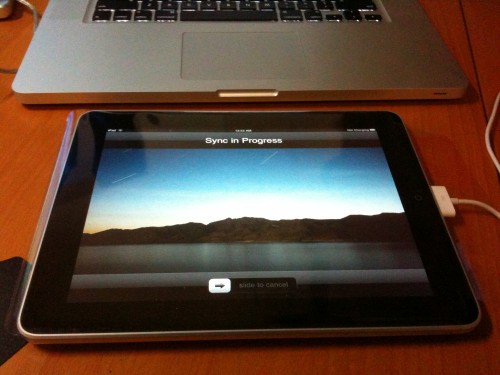
For those who are curious, it will charge from a MacBook Pro (2010). I’m glad I can probably keep the chunky charger at home. I think it’s just trickle charging, but whatever. Usually if I have my phone charging from my computer when I’m away from home, it’s just so I don’t run down the battery after 8 hours in rehearsal. As long as the battery level isn’t going down, I don’t usually need it to go up.

This heat issue

I know a lot is being made of some reports of iPad 3s overheating. I haven’t noticed it myself. But then again I haven’t been playing 3D games. I have streamed several hours of video non-stop, without any noticeable heat at all, though. I’m curious to see if this turns into a problem-problem or just a quirk of this model. “My iPad is hotter than my old one” is a problem along the lines of “My PowerMac G4 MDD sounds like a wind tunnel.” “My iPad is shutting down because it’s overheating” is something a bit more serious, so I’d like to know how many people are actually experiencing that severe of a problem. The more time goes on, the less this is sounding like a real issue. More recent reports have said that the heat is in line with similar Android tablets.

Software

First of all, I just want to say something to the development community in general: there are some really awesome sync solutions out there. Especially given how little control iOS gives to devs, they have made it possible to own three computing devices (computer, phone and tablet) and to feel like they’re all working in harmony without a lot of backtracking to move the data around. If apps that handle data couldn’t sync, it wouldn’t be worth the trouble to use more than one (certainly not more than two) devices for the same purpose.

Some credit also has to go to Apple, as iCloud is making its presence felt just a little more now. Syncing apps and other purchases automatically to all devices saves a lot of time. Not to mention all the stuff I already take for granted like bookmarks and email, calendars, contacts, etc. that were awesome enough when just syncing from computer to phone. What a pain it would be, with the potential for losing important information, if I had to remember to sync all my devices every time I made a change on one of them. However, it drives me nuts that it only syncs new apps, not updates to apps. No idea why it makes that distinction.

I also want to point out one of my longtime apps, the RSS reader Byline, which offers a discounted upgrade from their original iPhone-only app to their newer universal app. The App Store is pretty inflexible about giving developers the option to offer discounts or upgrade pricing, but they’ve found a way to do it. I’m not actually sure how they did it, but every other developer needs to steal it. They get bonus points for finding a way to give a break to loyal customers.

The internet look like ass.

When you start Safari, especially if like me, you spend several hours just setting up retina-enabled apps before venturing out onto the web, you will notice that sites that rely on graphics for their UI elements look like crap. Web developers are starting to discuss ways to adapt their sites for the new iPad, but apparently it’s not simple: it means either serving bandwidth-hogging large images to everyone, or using javascript to decide which images to show based on what device is viewing it. There doesn’t seem to be much of a consensus about the best way to handle it, but people are already talking about the impact this will have on web design.

Personally, I’m grateful that this site doesn’t look that bad, as I’ve always tried to keep the use of images to a bare minimum anyway. I’m going to let everyone else figure out the best solution before I worry about it. There are a couple tiny background images I might try to replace with CSS3.

No stocks and weather in the notification screen.

Boo! I don’t mind not having the apps, but the widgets are awesome. The stock ticker and location-aware weather summary on the notification pull-down thing make them very worthwhile. Before iOS5 I could understand eliminating the built-in apps since there are so many better ones available in the App Store. But since third-party apps can’t have similar displays on the notification screen, there’s no way to replace the functionality of the Apple apps. I wish they could at least be optionally downloaded from the App Store.

Wallpaper

You’re going to need some big wallpaper to cover the 2048×2048 total size of the iPad’s screen (it needs to be 2048 in both dimensions so that it covers the screen no matter which way you turn the iPad). My favorite wallpaper site, Interfacelift has a surprising number of iPad3-sized wallpapers already available, with more added every day. That link will take you directly to the iPad3-compatible offerings.

Apps I Love So Far:

Most of the following apps are already compatible with the retina display, and all are making the most of the iPad’s capabilities.

TweetBot – Possibly the best Twitter client

Skitch – easy illustration app recently acquired by Evernote

Alien Blue – truly awesome Reddit client

Byline – Google Reader RSS client I mentioned above – not updated for the retina display, but I didn’t notice that until I checked. Still like it better than all other RSS clients I tried.

OmniFocus – feature-rich project and task management app. The iPad client is without a doubt their best UI.

What’s On – a TV listing app. Soooo much easier to read than on the iPhone’s tiny screen. Not retina-enhanced, but the listings themselves are hi-res text, so I don’t even notice it.

Google Maps (built-in) / Google Earth – The UI on Google Earth is not retina-enhanced, but that’s hardly the point. The satellite view maps look amazing on the screen, and the size and touch interface of the iPad is a great way to explore the maps.

Use Cases and Other Thoughts

Stay tuned for another post which will look more in-depth at how I find the iPad useful for work and other activities. I started to include some of that stuff, but I think it’s a bit premature at this point, and both posts will be better served by remaining separate. I’ve just started using the iPad in preproduction for my next show, and I’m also working a benefit on Monday, so I should be coming up with some good experiences to share soon.


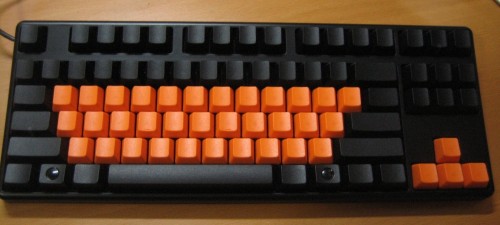
October 30, 2011

Review: Leopold Tenkeyless Otaku Keyboard

I call this: computers,tech — Posted by KP @ 9:11 am

Background

Months ago, I published a review of the Das Keyboard Ultimate Silent, one of the most popular mechanical keyboards available in the US. At the end of the review I said that I was returning the keyboard because while I loved it, the keypad was mostly useless to me and getting in the way of my mouse, and I was looking to get one of the “tenkeyless” designs popular with Asian manufacturers.

So I did. Months ago. And I took these pictures. Months ago. I wrote the bulk of a review. Months ago. And I have no idea why, but I just never got around to putting it all together. And I’m glad I didn’t, because what ended up happening is that last month Das put up this special offer on Reddit where you could buy a keyboard and they’d send you all kinds of swag, and that was enough to get me to do something about the fact that I’d been missing the feel of the Das for months. The other thing that made my initial reason for not purchasing it irrelevant is that Mac OS X Lion made the traditional mouse pointless, so I had stopped using one anyway, making plenty of room for the keypad.

So anyway, I went back to using the Das for my MacBook Pro, and my other purchase, the Leopold Tenkeyless, is now on my gaming rig. It’s not a particularly good choice for a gaming keyboard, but since I use the machine for less strenuous gaming these days, I’d been looking for something small and solid to replace the giant Logitech G15 I’ve had forever.

Design

Leopold’s style is very similar to another manufacturer, Filco, which is generally considered to be a little bit higher-quality than Leopold. I really can’t comment on that, because I’ve never used one, but that assessment seems to be more-or-less universal.

Despite that, the Leopold has a few advantages:

  • the USB cable detaches from the keyboard, which makes it a little easier to transport, and I suppose you could replace the cable if you wanted/needed to.
  • It also has notches for the cable to run in to the left or right, if your setup works better having the cable come out either side instead of straight out the back.
  • There’s no branding on it at all, which some people like. I don’t mind as long as it looks good.
  • The lights for caps lock, num lock and scroll lock are blue LEDs built into the buttons. I think they look much classier than the Filco, which has basic LEDs on the upper-right of the board.

The Leopold feels very well constructed. It’s surprisingly heavy, and doesn’t scoot around on the desk. It manages to preserve traditional keyboard dimensions without wasting any space. It’s a great keyboard for tiny work areas, or work areas you’d like to be able to expand by shoving the keyboard out of the way easily.

Otaku

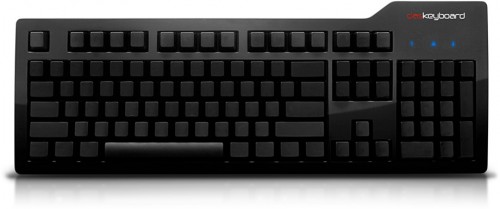
In the keyboard community, Otaku is a Japanese word (which means “enthusiast”), which has come to mean having no markings on the keys. It’s the same thing as the “Ultimate” in the Das Keyboard Ultimate. Some people like it because it makes you look like a keyboarding ninja. Others like it because it keeps their less keyboard-savvy friends, coworkers and relatives from using their computer. Honestly I like it because I think the printing on most mechanical keyboards is ugly.

While I touch-type, sometimes hunting and pecking is useful, like when typing in a password, or other sequence of keys that you really don’t want to screw up on the first try. So there are disadvantages to having Otaku keys, but I still think it’s cool. It might bother me more if my primary computer wasn’t a laptop. Any time I really need the keys labeled I reach up to the keyboard that’s right in front of me.

Custom Keycaps

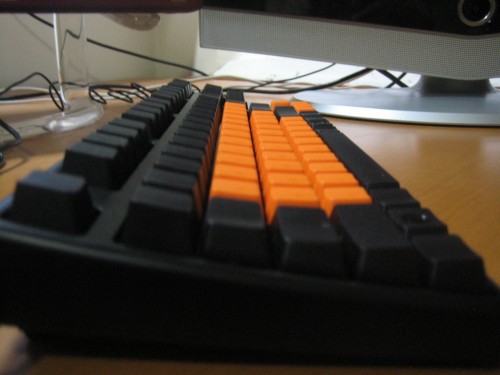
The keyboard as pictured in these photos isn’t how it comes. The keys are supposed to be all black. I bought a set of custom orange keycaps on eBay. One of my complaints about the Leopold keys was that the little ridges on the default F and J keys were very small and hard to feel. On a normal keyboard this might be a minor complaint, but when there are no letters to see, you need a little more reassurance that you’re on the right keys. I also felt that relative to the Das, the keys felt lighter and cheaper. I know the Leopold uses ABS plastic, I’m not sure if Das uses the better PBT plastic. It’s entirely possible they don’t. My orange keys are PBT, which helped, but it still doesn’t feel as good as the Das. I’ve never quite been able to put my finger on it, but something makes it more comfortable to type on. It might be the shape or angle of the keys, or the spacing.

Recommendation

When it comes down to giving an actual recommendation, I don’t really know what to say. There are a lot of good things about this board. I haven’t been able to try its most direct competitor, the Filco Majestouch 2, but I suspect you do indeed get what you pay for. There are subtle design differences, which are a matter of personal preference, but the Filco is on average about $30 more, and based on what people say, that seems to be reflected in a slightly higher-quality product. The Leopold is not cheap crap, by any means. It’s just something to be aware of, depending on what your priorities are.

I also can’t really tell you what’s wrong with it. I’ve heard critical things about it having a noisy spacebar, “mushy” enter or backspace keys, or that the Cherry brown switches don’t have a good tactile bump. I don’t find any of that to be true. There may be other keyboards that feel better, but there’s no defect I can point to. Still, it just doesn’t feel “right” to me. If I had never used the Das for two weeks, I might not have ever thought about it. But honestly, I used the Leopold as my primary keyboard for three months, and I couldn’t get the feel of the Das out of my head. It’s not a very scientific opinion, but take it for what it’s worth.

Where to Buy

If you’re in the US and interested in purchasing a Leopold, pretty much the only place to get it is from EliteKeyboards. Their stock and availability of different styles and switch options fluctuates, but they recently added some new models, including an all-white version.

If you want a Filco, Amazon is your best bet, as a middleman to some overseas retailers such as The Keyboard Company in the UK. And they support Amazon Prime, which is great if you’re a member. Try this link for a selection of what’s available. You can also find individuals selling used boards on there.

And if you want a Das Keyboard, you can buy directly from Das, or from other retailers like Amazon. J&R in Manhattan has at least some of the variants for sale, where you can try them in person.


May 27, 2011

Keyboard Review: Das Keyboard Ultimate (Silent)

I call this: computers,tech — Posted by KP @ 7:50 pm

When I got home from the road, I was determined to celebrate having a desk. As in, having the same desk every day, not something that passes for a desk in a hotel room or on a bus. The first way I went about celebrating was to research buying a new keyboard for my laptop. I want to give my laptop more of a desktop-like experience when plugged in at home, with a real keyboard and mouse, and multiple monitors.

What I have

I have a gaming keyboard (one of the original G15s from Logitech) which is connected to my PC, but when it comes to other keyboards in my household, I have an old and broken Apple Pro Keyboard in graphite somewhere in the bottom of my closet, a slightly less-old and not-broken Apple Pro Keyboard in white, and some crappy miniature backlit keyboard that I found on sale for $20 on the road three years ago. Aside from the G15, none of these are what could be called pleasant to type on. The G15 is decent, but it was needed for gaming, and I’ve always thought if ever I got the hell off the road, I wanted a really nice mechanical keyboard, one that would be geared towards writing, not for gaming.

Keyboard snobbery

While not as rabid as some fans, I did grow up typing on the old IBM Model M keyboards, so I did feel some nostalgia towards mechanical keyboards, although I definitely did not want a Model M replica (which are still made by Unicomp, and can be seen here).

The first thing I want to say about keyboard snobbery is that if you feel you may take keyboards a little too seriously, you need to head on over to geekhack.org. There you will find a forum filled with people who know everything about every kind of keyboard out there. I learned much in just a few days of lurking. They also sell and trade obscure keyboards and parts, and there are wikis and reviews with more information, too.

Two other forums I’ve found with some good info are at Overclock.net (especially The Mechanical Keyboard Guide, which is a great resource for beginners trying to choose a keyboard), and HardForum.com which has more opinions and reviews.

Probably the first decision you have to make when choosing a mechanical keyboard is what kind of switches you want. The most common and cost-effective ones are made by Cherry, and are designated by the color of the plastic used for the top of the switch, which indicates the design of the internals. That guide I posted above from Overclock demonstrates the differences between each color. I should also mention that when I say “cost-effective,” bear in mind that mechanical keyboards are expensive. That’s why hardly anybody makes them anymore. They’re pretty much always going to be over $100, and the ones that use better switches than Cherry are usually going to be over $200.

When first researching, I was thinking I was interested in Cherry blues, which are recommended for typing (not so much for gaming), and have that nice loud, annoying click sound that mechanical keyboards were originally known for. They are highly not recommended if you plan to use your keyboard at work or in a home where other people will be able to hear you clacking away. But since I live alone and planned to keep my keyboard at home, I thought I would revel in the satisfying click of every letter I typed.

Slightly more popular than blues are Cherry browns, which are similar to the blues, but without the click. The thing people like about the blues is that they have an audible and tactile indication of when the keypress registers (which is about halfway through the press, not when it bottoms out). The browns have only a tactile bump, and no sound. That’s not to say they’re totally silent, but they don’t purposely produce noise. If you were really trying to type quietly, you can do it as well or maybe even better than you could on any other keyboard. But if you’re typing vigorously, you do get a heart-warming clickity-clack from pressing the keys down if you bottom out, and the noise of the key bouncing back up.

Trying it out

One of the few mechanical keyboards easily available in the US is the Das Keyboard, which was originally famous for having no markings at all on its keys — just a sea of blank black keys. These days they also sell a model that has letters printed on it, but I didn’t see the point of going halfway if you’re going to buy a badass keyboard.

At first this was what I thought I wanted — they sell both the printed and non-printed keyboards with blue or brown switches. But when I started to read reviews I got directed to the fine forums I mentioned above for recommendations of even higher-quality keyboards. I had a lot of choices to make.

While inspecting my options for purchase, I was looking at the Das on Amazon, and noticed the version I had put in my shopping cart was supplied by J&R Computers. And I was like, “reeeaaaalllly?” So I took a non-virtual shopping trip to J&R and played with both the blue- and brown-switched versions in person. I also came prepared with a thorough knowledge of their return policy (14 days), and a determination to buy a keyboard, whether I ended up liking it or not.

Decisions, Decisions

I went back and forth between the blue and the brown. The clicks of the blues were fun, but I found myself not really liking the feel of it. It’s very hard to tell in a store — I’ve never experienced a new keyboard that I liked typing on right away. But I found somehow the clicks were actually confusing and distracting me. I’m sure I would have figured it out, given enough practice. I also felt the slightly greater weight needed to depress the keys was making my fingers feel a little overworked. What really surprised me about the whole experience was not that I didn’t like the blues right away, but that I did like the browns. They didn’t feel mushy to me, they just felt like they would stay out of my way instead of making the experience of typing all about them. So I decided that since I wasn’t locked into my decision anyway, it might be the braver choice to take home the keyboard I thought I didn’t want, and make it prove to me that something was wrong with it. Also, in the back of my mind I was aware that the browns are more popular, and if I liked them I would have a wider range of options when looking at other models.

So I took home my Das Keyboard Ultimate Silent edition.

The Review

The first thing I’m going to say is that I’m not keeping it. It’s not that it’s a bad keyboard. I actually like it a lot. The real dealbreaker for me is that I don’t want the number pad. A bunch of other manufacturers offer a “tenkeyless” version, which is an otherwise full-size keyboard with the number pad lopped off. The idea being that if you don’t need a number pad you can slide the keyboard more to the right without pushing your mousepad miles away, which allows you to have the actual typing part of your keyboard more centered on your screen, and your mouse closer at hand, which just makes a whole lot of sense. The moment I got the Das home, I tried to slide it more in front of my screen and it crashed into my mousepad and I thought, “this would be perfect if I could just have those four inches back.” So I knew right away I had to go with another manufacturer. I just thought I should get that out of the way, because my decision not to keep it is really separate from my opinion of it as a very nice keyboard.

Casing

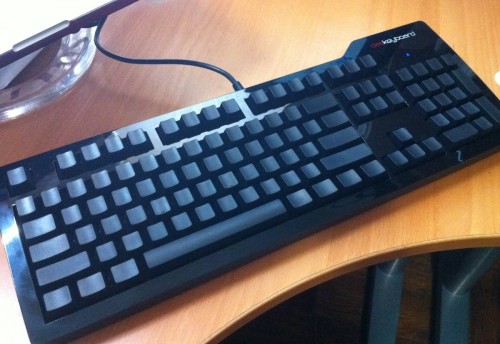
The body is shiny black plastic, and the keys are matte black. This contrast is really sexy. I’ve read a lot of reviews that criticize the piano finish because it collects dust and fingerprints. Yeah, it does. They actually include a lint-free cloth in the package, which is nice. It’s really a personal decision. If it makes you happy to look at your keyboard and think, “damn that looks really sexy,” then I think you should spend 30 seconds dusting it off every couple days. If you don’t want to put that much work into it, then you might prefer something that will never look as good, but also will never look as bad when not cleaned. I personally like it, and it’s actually the one thing I will miss from going with another model.

The other nice aesthetic touch is the way the caps lock, scroll lock and num lock lights show up. They’re below the logo on the upper-right, but you can’t see them at all unless they’re illuminated. I took the picture with the caps lock on so you can see. It’s hard to tell, but the icons are bright blue.

In general, mechanical keyboards are heavier than others, which is quite fun, as long as you’re not carrying it somewhere all the time. It feels very substantial and sturdy. I like to use the flip-out feet on all my keyboards, and these stand nice and firm.

The one thing I find a little weird about the physical design is the two USB ports on the right side. Having additional USB ports close at hand is always useful, but I don’t like that you have to plug in two plugs in order for this to work (one carrying the keyboardy-stuff, and one just for the two USB ports). I’m sure there’s a reason all the data and/or power can’t be passed through a single connection, and the Das doesn’t appear to be the only high-end keyboard that operates this way, but it’s just a little bit of a disappointment. If you’re a little short on empty USB ports, you should know that in order to fully use this keyboard, you will lose two slots. This wasn’t a real problem for me. Mainly I felt that it made the lack of a USB hub on the other keyboards I was considering less of a negative. In my case my laptop and a 7-port hub sit mere inches from my keyboard, so it’s not like I need ports on my keyboard to save me from having to reach down under my desk or something. If that sounds like your situation, then you may appreciate the Das more. It also comes with quite a long cable, if you need to have your computer far from your keyboard. It’s a single cable until it splits to two USB plugs at the end. The cable is slightly thicker than normal, but not ridiculous.

Typing Experience – switches

As I said, I took home the one with Cherry brown switches, to find out exactly what it is that makes them so popular. I was quickly sold. I am a bit curious to try the blues longer-term, but I’m pretty convinced that I will truly enjoy the experience of typing on the browns more, whereas the blues would be more for nostalgia and making me work harder, just so I can think “look I’m typing on a really expensive mechanical keyboard” with every keystroke, instead of, you know, thinking about what I’m writing.

Typing Experience – blank keys

The other big gamble I was taking, which is why I was glad for the opportunity to easily test-drive the Das, was whether I would enjoy typing on the blank keys. I am a touch-typer, but I’m the craziest touch-typer you’ve probably ever seen. When I was in school we learned all the ASDF / JKL; techniques (I can still hear the voice of the nun who taught our typing class reciting those letters over and over). I know how to properly touch-type, but somewhere along the way found it was faster to just assign fingers to keys on the fly, based on whatever was most convenient for the word I was typing. I guess the best way to describe it is that I find the keys not based on fingers (as in, the “E” is the key above my left middle finger), but based on where the “E” is relative to the whole keyboard. It’s weird, but it works for me, and when I broke the tip of my right index finger, I typed for months using just my middle finger and ring finger, without any real decrease in speed, making my typing look even more ridiculous than normal and confusing the hell out of everyone I worked with.

I still need to have my bearings relative to the whole keyboard when I start, so I’m very grateful that the Das has nice thick ridges on the bottom of the F and J keys, which can be a visual or touch-based reminder of where everything is. Normally when I start typing I get my bearings by looking at the key I want to start with, and I can actually still do that without the letters most of the time, but I find myself using the ridges for guidance more than normal on the Das.

The scarier part of having no markings is the numbers and symbols. I think most people probably don’t bother to memorize that, and usually are hunting and pecking when typing them. I’ve had to use a little trial-and-error on those sometimes, but I’m doing pretty well. Also, in my particular case, I still have my laptop within reach, and in situations where I really need to type something correctly on the first try (like typing in a password that doesn’t display on screen), I can reach over and type it on my laptop instead.

I’ll be the first person to admit that the whole concept behind the original Das Keyboard was “look what a badass computer geek I am, I don’t need anything written on my keys,” and if you get the Ultimate Editions, that’s still the point. Another common reason people like them is that it’s good for keeping other people from using your computer, because if they can’t type on it, they won’t bug you to use it. This is a brilliant strategy, however since I’m using it at home it doesn’t really benefit me.

Frankly, I think plain black keyboards with white lettering are kind of boring. I’m more accustomed to gaming keyboards that have colorful backlit keys and interesting body designs. I think the blank keys are the only thing that can make otherwise ordinary-looking keyboards look cool, so I was more inclined to get the blank keys for that reason, rather than to show off (to nobody, in my apartment) how I can type without the letters. So yeah, it’s just because I think it looks slick and streamlined, it doesn’t have any function. There are also manufacturers (Realforce and Happy Hacking) that have nearly black-on-black lettering by default, and that looks almost as good, while still basically having the slick all-black appearance, plus the ability to see what the hell you’re doing if you need to. They are both, as the kids say, mad expensive. Unrelated to the color of the keys, they feature the higher-end Topre switches and are close to $300. A number of other mechanical keyboards feature blank keys as an option, mostly those made in Asia, where the style is known as otaku (enthusiast).

Anyway, my assessment of the blank keys is that they don’t impede my use of the keyboard in any serious way. I did some basic online typing tests in the first couple days I had the keyboard and was scoring on average about 75wpm on a keyboard I just got, and that was with tons of mistakes that seemed to come more as a result of an unfamiliar keyboard (i.e. not knowing how far apart the keys are or how much pressure they require) than from anything about the board itself. Those kind of things would quickly improve just from getting used to the dimensions of the key layout.

Wait a Minute, What About the Razer BlackWidow?

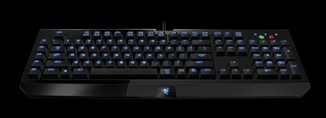
The other mechanical keyboard relatively easily-purchased in the US is the new BlackWidow from gaming peripheral maker Razer. You may have noticed from this blog that I own a lot of Razer products. The BlackWidow Ultimate is a gaming keyboard with Cherry blue switches, full backlighting, macro keys, USB and headphone/mic connections, media keys, powerful software, and all that good stuff you’d expect in a gaming keyboard.

When I first thought to myself, “I want to treat myself to a new keyboard when I get home,” this was the one I had in mind. It had just come out, and it sounded great. But I’ve heard some so-so things about the quality on them, and the more I started to re-think how I would make my desk more user-friendly, it became more about a compact and comfortable keyboard for my laptop, rather than sharing a gaming keyboard with my PC.

I have kind of a love-hate relationship with Razer. They make great gaming products, but honestly if you’re not using them for gaming, they can kind of be a pain in the ass. The drivers and software are just added complications. I’ve ranted on this subject before. Yes, for gaming you need that kind of programmability, but I like to live a little leaner when working.

I wasn’t going to buy the BlackWidow just for typing on my laptop, and in that case, I’d wind up gaming with it, and using the G15 for my laptop, which then ends me up with a mediocre typing experience instead of a great one, so what would be the point of spending all that money? And to be honest, I’m not doing the kind of serious gaming where having something better than the G15 would matter anymore.

The things I’d been hearing about the quality control on the BlackWidow made me nervous. There will be somebody saying something bad about any product, and others who will say they have no problems, but I was wary. It needs to type. You press a key, it makes a letter. And I knew from the half-dozen or so Razer products I own, they have probably totally over-thought things and in their enthusiasm, endangered its ability to reliably put characters on a screen. I don’t mean this to be a total trash-Razer post, I’m enjoying using several Razer products just in the course of writing this post, but I came to the conclusion that what I wanted most from this particular purchase called for a manufacturer with their priorities in different places.

That being said, the BlackWidow is very feature-rich, competitively priced (including the non-Ultimate version without backlighting and USB/headphone connections, which is very cheap at $80), and is probably the most widely-available mechanical keyboard in the US right now.

Other Options

I really intended this mostly to be a review of the Das Keyboard, but for a very brief look at what else is out there, the main competition is Filco, Leopold, Realforce, Happy Hacking and Ducky. I haven’t linked to any of these, you will note, because most of them are so hard to get, and so often out of stock, that I doubt any links I gave you would remain reliable. Googling may be your best bet. Amazon also has some, but the stock is usually very limited and pretty much always from third-party sellers, so it seems to be very hit-or-miss.

EliteKeyboards is a small US-based company that imports high-end keyboards and accessories from Asia. I have made my decision and ordered a Leopold Cherry brown tenkeyless otaku keyboard from them. Oh, fine, here’s the link, but good luck with that. I’ll save my discussion about why I chose it for a review of that, once I get it and have some time with it.

Basic Keyboard Tip for Macs

I know I have a lot of Mac-owning readers, and I just want to make sure you’re aware of a sort-of-buried system preference setting for using third-party keyboards.

Most PC keyboards you plug in will map the option key as the command key, and vice-versa. There’s a really simple fix for this:

  • Go to System Preferences / Keyboards
  • Click the button “Modifier Keys”
  • Select your keyboard in the pull-down menu if it’s not already
  • Set the option key to be command and command to be option
  • Click OK, and you’ll never have to worry about it again

These directions are taken from Snow Leopard, but hopefully are pretty consistent among all recent OSes.


June 20, 2010

Mac RSS Reader Reviews – Gruml and Socialite

I call this: mac,tech — Posted by KP @ 8:07 pm

I like reading a lot of tech blogs and keeping up with the happenings in the world in general. One way that I try to save time, while at the same time being as close as possible to knowing things the moment they happen, is to subscribe to a lot of RSS feeds.

RSS stands for Really Simple Syndication, and is a standard format for compressing web articles into simple text and pictures which can be downloaded and read in other formats besides the site they are on. Some mail clients, like Apple’s Mail.app have RSS readers built in, so you can see articles from your favorite sites in a similar way to how you read your email. Most browsers can display RSS feeds, and then there are a number of separate applications dedicated to more robust management of feeds. That’s what I’m going to talk about today.

My first criteria in choosing an RSS app is that it must be compatible with Google Reader. Reader is Google’s web-based RSS aggregator that is popular mostly because of its syncing features. You can subscribe and read feeds from its rather busy web interface, or use an app on your mobile device or computer that supports Reader. If you read an article in one place, mark it as a favorite, etc. those changes will be synced and carried over when you access your feeds again, no matter what device you’re using.

My choice for an iPhone RSS app is Byline, which was the first (probably no longer the only) app to support offline caching of photos. The offline feature is really important to me when I’m home because I like to read my feeds on the train, and the ability to display photos offline is very helpful as a lot of tech blogs are really boring and pointless when you can’t see the pictures. Imagine reading Engadget, of which 90% of their posts are like, “Look at this cool secret phone somebody snapped a picture of.” “Here’s a picture of Motorolla’s latest thingamajiggy.” Not being able to see the pictures totally ruins it. Byline is $4.99, but there is now a free version that’s ad-supported as well.

On the Mac side, I’ve spent the last few months searching for the perfect RSS reader. Especially when I’m not working, or when working from home, I like to have my RSS reader running in the background all the time, and check on it all day long when it displays a badge showing unread articles.

I tried at least a half-dozen apps, but very quickly narrowed my search to two possible candidates: Gruml and Socialite.

Gruml

Gruml is free, and open-source. It’s also in beta (maybe one of those perpeturally-in-beta things), so it doesn’t always work perfectly.

What I love about Gruml is that it tries very hard to support every feature of Google Reader. You can set favorites, likes, comments, share articles, write notes on articles, and see the list of recommended feeds generated based on the articles you’re reading. So far as I can tell, it’s not missing any of the available features. It has an optional built-in tabbed browser, if you want to visit the web page for an article without leaving the Gruml window or cluttering up your main browser. It also has a very attractive, Mac-like interface. It offers several simple styles for displaying content (I like graphite, myself), and you can create your own if you know CSS.

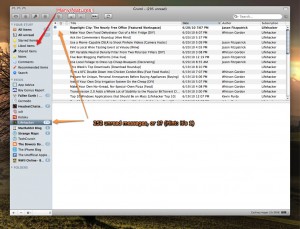
However, I find it to be slow. Unread counts are very unreliable. If you enlarge this screenshot you can see I have drawn attention to a slight discrepancy in the unread count of the Lifehacker feed. On the sidebar it says 252, but in the list it shows only 1 (which is correct). More importantly, the number in the dock icon’s unread badge is 295, which includes the phantom 251 articles. It’s really annoying to see the unread badge in the dock when in fact all the articles are read. I’m constantly clicking on things that I shouldn’t be because it’s mis-reporting read and unread feeds. A recent update has improved the speed a bit, but I always feel like it doesn’t try to retrieve feeds until I click on them, which causes a bit of a lag, and is absolutely unacceptable when on a slow or intermittent internet connection.

The bottom line is, I want to like Gruml so badly, but the performance issues make it unpleasant to use. But as it’s beta and being developed for free, I can’t complain, and I have high hopes that someday it could be perfect.

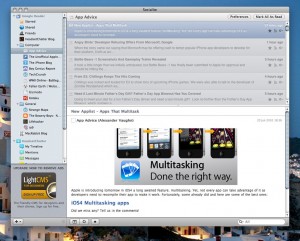
Socialite

Socialite approaches the concept of an RSS reader a bit differently than most. It’s not just about RSS. The concept is that it’s a place to keep up on all your social networks: blogs, Facebook, Twitter, Digg, Flickr, and lots of other stuff, all in one place. Socialite is a paid app, which sells for $29.00, but never fear, there is a free version which is ad-supported, and just recently was improved to unlock all the paid features. Also, the developer, Realmac Software, very often participates in bundles like MacHeist, and I’m hoping that it will be included in the next bundle that comes out.

The two ways I use Socialite most are for RSS feeds and Twitter. It’s not the most feature-rich in either — basically it tries to access many different services using a somewhat unified interface, so it’s not particularly designed to use any of them in the most ideal way, but it still manages to support the most common features. It’s definitely handy not to have to check a separate Twitter client, and it does a decent job at presenting Facebook content in a less annoying way than the actual Facebook site. You can also individually select which types of content you want to display in the unread count on the dock icon. I like this because I want to be alerted of all new Twitter and RSS news as soon as they come in, but I don’t care so much about checking Digg or Facebook every time.

Speaking of timely alerts, one of the simplest but most important differences between Socialite and Gruml is that Socialite can refresh feeds every minute, while the most frequently Gruml will automatically update is every five minutes.

One con of Socialite is that it doesn’t have a built-in browser, but it will open links in Safari either in the background or foreground, depending on your preference, which is probably a better, more stable way of doing it anyway. Also, if you have one of the new Macbook Pros that can switch between on-board graphics and the Nvidia graphics card to save power, Socialite for some reason triggers the more power-hungry card, and Gruml does not. No idea what that’s about, and it’s not a dealbreaker for me, but if you’re obsessed with battery life, it would make a difference if you had it running all day.

The Winner, for Now

After spending the last few months bouncing back and forth, through many updates to both apps, I am currently using Socialite. It feels more stable and polished, and although it’s not as pretty, and lacks some of the advanced Google Reader support that Gruml has, the many features it does have work very reliably, and on top of that it also offers access to other services.

When I set out on this quest months ago, I intended to within a week be able to write a review of the RSS app I liked best, but I found it too hard to pick a clear winner, so I submit both for your consideration. There are reasons to love either one, so take your pick!

Postscript

If you’re looking for some feeds to subscribe to, these are some I recommend. Most browsers and RSS readers work happily together and you should just be able to click on the links, but I’ve included the URLs for them as well in case you need to copy and paste them.

HeadsetChatter Blog (well I read this so I can check on how my articles are looking in RSS, you should read it to keep up on all the latest posts!) http://headsetchatter.com/blog/feed/

TUAW – the Unofficial Apple Weblog http://www.tuaw.com/rss.xml

The iPhone Blog http://feeds.feedburner.com/TheiPhoneBlog

App Advice Awesome for finding out about iPhone apps that are put on sale or free for a limited time. http://feeds2.feedburner.com/AppAdvice

TechCrunch http://feedproxy.google.com/TechCrunch

Gizmodo http://feeds.gawker.com/gizmodo/vip

Kotaku (video game news) http://feeds.gawker.com/kotaku/vip

Boy Genius Report http://www.boygeniusreport.com/feed/

Lifehacker http://feeds.gawker.com/lifehacker/vip

The Bowery Boys (NYC history) http://theboweryboys.blogspot.com/feeds/posts/default?alt=rss

Strange Maps http://strangemaps.wordpress.com/feed/


May 26, 2010

Review: Speck SeeThru Satin MacBook Pro Shell

I call this: mac,tech — Posted by KP @ 6:48 pm

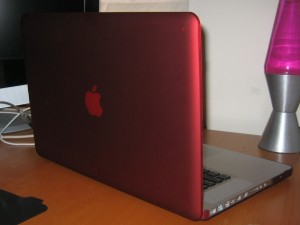
I’ve admired these shells for years. I like color, I like customizing things, and I like protecting my valuable devices — as long as the protection is attractive, stays out of my way, and doesn’t add too much bulk. Our wardrobe supervisor on tour this year had almost the same shell, only in a different color. I had many opportunities to study it, as it was hard to find someplace to sit in the front lounge while dodging the six Macbooks and one (gasp) PC that lived on the bus. I would question him about it regularly over the course of the tour. It really didn’t get scratched under the case? How often do you look? How often do you take it off? How long have you had it? You’re really sure it’s not causing abrasions on the aluminum? Do you find you use it differently because you have the case on? Is it too heavy? After six months of this I was reasonably sure it wouldn’t hurt my laptop.

A life lesson, learned the hard way: There’s a button on the case covering the battery button (which illuminates a series of LEDs showing the battery charge). Part of the case is sort of cut out around the button so it’s loose and can be pushed in. As it happens, this color of case is so dark that you really can’t see the LEDs light up. For the longest time I struggled putting the case on and off, checking the alignment, testing the battery button naked, and trying to figure out why it didn’t work with the case on. Eventually I manipulated the plastic button so much that it broke off. I didn’t really care, by that point I was so disappointed that it didn’t work that I was OK with poking something in the resulting hole to get to the real button (I can just barely press it with my pinky, but I have tiny hands). Only then did I figure out that the button was probably working the whole time, and I just couldn’t see the lights. Disappointing on several levels.

I might as well mention that the other LED on the case, the sleep light, shines through just fine, and actually looks pretty cool in red. As anyone who has ever slept in the same room as a Mac knows, the sleep lights on all of them can pretty much be seen from space, and you’ve probably devised some method of covering them up so they don’t scorch through your eyelids while you sleep. So dulling the light with the case is not a bad side effect.

PROS:

  • Attractive design, rich color
  • Protects from scratches and dents
  • Adds very little thickness, lid closes smoothly
  • All cutouts fit around ports and other features well, and seem to have plenty of room for bulky peripherals.
  • If the sharp front edge of the MBP bothers you, the plastic provides some relief from directly resting your arms on the metal
  • Puts a layer of protection between your lap and the metal case, making it possible to use the computer on your lap without burning yourself.
  • Soft-touch surface creates better friction for holding the computer on your lap without it sliding off.
  • Sturdy rubber feet, similar to the ones that come on the new Macbooks.

CONS:

  • Can barely see battery lights through case.
  • Very tight to put on the screen half, to the point that I’m concerned about damaging the laptop with frequent attaching and detatching. I’ve actually cancelled my planned weekly case cleaning because of this. I’m also very sensitive to it because the whole reason I had to buy the new MBP was because the old one’s screen had been damaged. The last thing I intend to do with the new one is severely bend and press the screen once a week. I’d rather it get dirty and perhaps permanently scarred than encourage its early demise.
  • Adds about a pound-and-a-half to the 15″ model (bringing it to roughly 7 lbs)

The weight is significant. You wouldn’t think a thin layer of plastic would weigh so much, but it is the size of the entire computer itself. I had done my research about that beforehand, and I know what a pound-and-a-half is (perhaps you’re familiar with how anal I am about weight when packing for the road), and I know what a difference it is in laptop terms. I think the difference isn’t so great to outweigh (literally) the benefits of protecting the device. This is, after all, the most important thing I own, as well as the most expensive. It needs to last in excellent condition for three, or ideally four years. Making it heavier is a small price to pay for the ability to use it without constantly worrying about damaging it. Of course the case will not protect it from serious damage, but for everyday hazards (like the contents of the kitchen counter falling on the lid on a moving bus), it places an extra layer of protection between the computer and light bumps and bruises. In a situation where I know the MBP won’t be traveling much for a while, I might keep the case off, but definitely on the road or in a rehearsal situation utilizing many rooms and locations, it will be a huge help.

After much debate, mostly about the weight and price, I decided to go ahead and buy this because I bought a new computer bag (review to come eventually, I’m sure), and it has a zipper for a storage pouch that lives in basically the same spot as the top of the laptop. In other words the laptop slot doesn’t come all the way up over the top of the laptop, so the zipper would probably be rubbing against the bare laptop most of the time. Rather than hermetically sealing my neoprene sleeve every time the laptop goes in the bag, I decided that was the final straw to justify the Speck shell.

Magsafe? Magpainintheass.

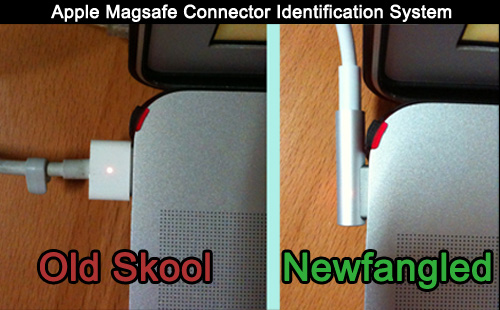
I worry a little about the newfangled Magsafe connector style, shown here:

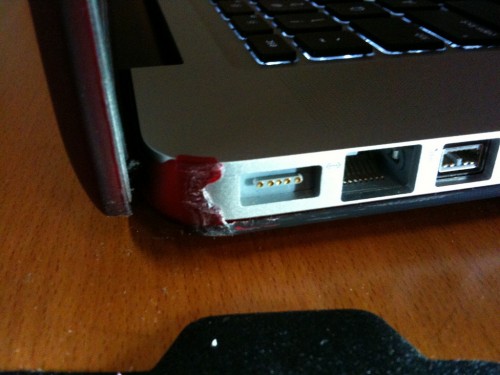
The natural way to position it is with the cord headed “upstage,” away from the user, and out of the way of the other ports. The only problem is that the little tab holding that corner of the shell on is right there with the connector laying over it. While it does make an electrical connection and seems to charge fine, it doesn’t look like it’s laying perfectly flat, and I just worry about my AC connection not being a perfect seal. If you don’t mind covering the Ethernet and FW800 ports, you can just turn the Magsafe connector the other way with the cord coming towards you, but that’s a pretty big compromise for something that should just work. It’s a pretty tricky part to try to mod yourself, as the piece that’s in the way is the part that clips that corner in, and if it were to break or be weakened, you’d probably have problems with the shell falling off. It might be easier to shave off a millimeter of the barrel of the Magsafe connector, but that seems like the wrong set of priorities, to damage an $80 electrical device that’s essential for the operation of the computer, for the sake of a $40 piece of plastic. In the future it would be nice if Speck could move the clippy part away from the corner and more toward the hinge, so that section right next to the AC port wouldn’t be so thick. Although it’s possible it would interfere with the operation of the hinge if moved any closer, I don’t know.

If you have the old-style charger, it’s no problem at all. I have an old-skool one at home, and use the new one for travel. I also have a second old-skool one for my old MBP, and should it become a real problem, I could swap them. So, buyer beware, but if you have the old one, you have nothing to worry about.

UPDATE: Before heading back out of town, I had to decide which AC adaptor to bring, and decided not to compromise. I brought the new adapter and filed down the case, after reading of a couple success stories. I used the edge of my Leatherman’s file, and a nail file for smoothing the edges. I decided to quit once it fit, rather than risk breaking or weakening the case by trying to make it look perfectly machined. So it’s not beautiful, but the plastic is fairly soft, and if you wanted to make it look prettier, it should be very possible.

A Few More Photos

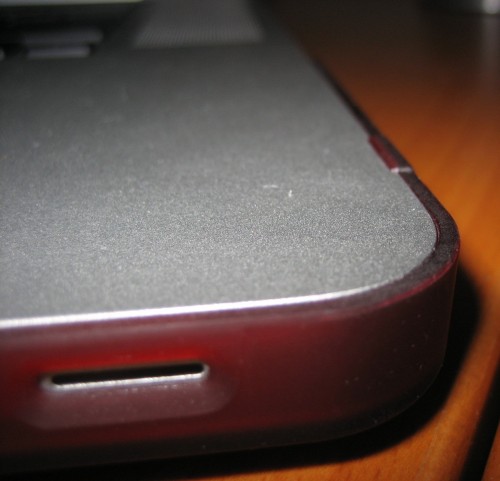
Detail shot of the front-right corner:

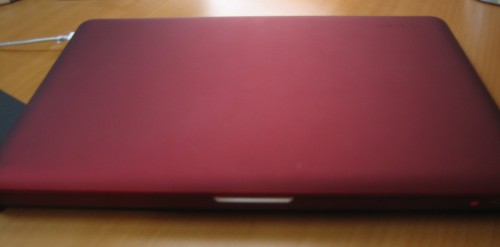
Outer shell. Sorry this is so blurry. I spent time on three separate days (with a real camera, even!) trying to get a shot that wasn’t blurry but didn’t wash out the true appearance with the flash.

The Details

Once again, the shell is made by Speck, who are purveyors of, well, stuff like this. They also make some iPhone and coming-soon iPad cases. In addition to the satin shells, they make a line of more fully-transparent shells that also come in other colors (including clear), which is the SeeThru line, as opposed to the SeeThru Satin. They make them to fit all shapes and sizes of Macbooks, so look carefully to make sure you’ve got the right one for your model. They are carried in Apple Stores, but I always find the selection to be rather limited as far as which sizes and colors are in stock. I had to order mine online, which I got from Small Dog Electronics, my favorite 3rd-party Apple retailer.

The shells retail from Speck for $49.95, but Small Dog sells them for $39.99, so shop around. You can also get them on Amazon, where the prices are generally a little higher, but you might find a good deal on a specific color.


May 8, 2010

iPhone App Review: Pano

I call this: phones,tech — Posted by KP @ 7:46 pm

I don’t usually do reviews of individual apps, but I feel like this one needs it, because it’s not just an app, but a way of taking photos that has specific applications for stage management that I find handy.

Pano ($1.99 on the App Store) is a photo-taking app that automatically stitches together multiple photos to make a panorama.

Now of course you could do this with any camera and then spend an hour painstakingly putting the photos together yourself in Photoshop, but this app will do a surprisingly good job in about a minute, all right there on your phone. The convenience of it is that even if you have the skill and software to make your own panoramas, this app allows you to do it almost as fast as taking a regular picture, which allows you to use it in situations where it otherwise wouldn’t be practical, such as when you need to take a picture and email it to someone right away. Instead of making do with one or more regular photos that don’t capture everything you’re trying to show, you can give the big picture with a panorama.

Here’s a purely work-related example:

Before beginning rehearsal on Romeo and Juliet, Nick and I flew out to Minneapolis a few days early and set up the rehearsal room. Our director would not arrive until the night before rehearsals began, so to give her an idea of what the environment would be like, and a chance to request any changes, I took this panorama and emailed it to her. I didn’t do the greatest job, as you can see the room looks a little wiggly in the middle. I have been trying to get better at positioning myself to avoid distorting the image. Sometimes you don’t have the luxury of time or movement to set up the perfect shot, but in those cases Pano will still do a decent job of letting you snap off a few quick pics. It might be obvious it isn’t one photo, but it will still capture the idea of the space better than a single photo.


Here’s an example of why panoramas aren’t just for landscapes and wide open spaces: on tour this year we were big fans of playing Wii on our bus, and I wanted to take a picture of this. With the slide out, the bus is 10 feet wide, which is not usually very wide for a picture, but in the cramped conditions of a bus it’s hard to stand back far enough to get everything in the shot.

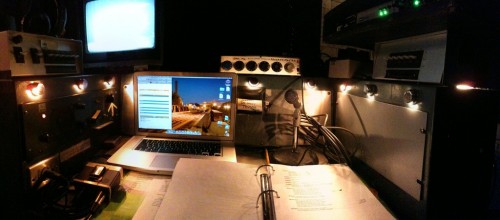
Another use I’ve found that’s kind of related to the above is that a panorama can be better at showing things the way the human eye perceives them. I had a really cool calling desk at one venue on the road, and just taking a flat picture of it wasn’t capturing all the detail. After several attempts, this is the best panorama I came up with:

If you look at the bottom edge of the Macbook you’ll see an imperfect stitch where it gets a little wavy, but for the most part it looks like a single image.

Basically what I’ve taken to using this app for is to get a better picture of something when all of it won’t fit in one frame. You can also get more detailed shots because you’re getting closeups of say, four sections of something, rather than standing back and getting a smaller-resolution photo of all of it.

So how does it work?

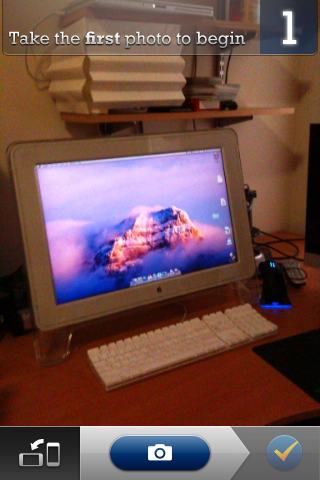
Now that I’ve told you all the reasons you should want this app, here’s how it actually works. As an example, I will take a picture of part of my desk.

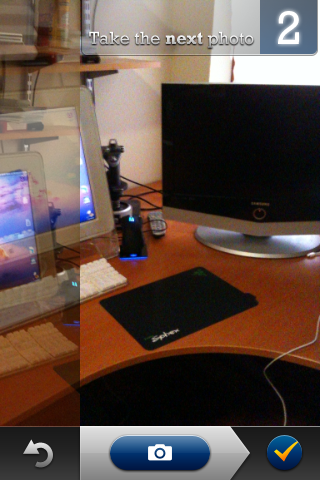
The first shot is easy, and every shot after that will show you a transparent slice of the edge you’re trying to align the next photo with:

The hardest part is putting yourself in the perfect position to get the next shot lined up with the guide from the previous shot. You may not notice you’re moving, but every slight adjustment in all three dimensions changes your alignment, and even when you think you’ve got a couple distinctive parts of the image lined up perfectly, there may be one thing that you didn’t notice was all out of whack, especially when dealing with things that are varying distances from the camera.

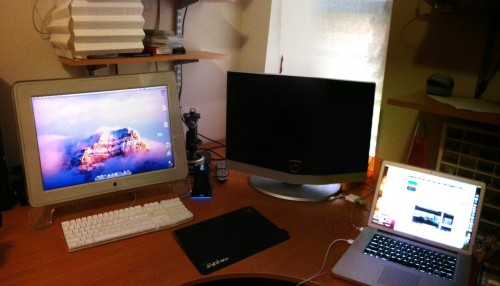
Here’s an example of the final product:

The one thing I really messed up is the iPhone cable coming off the computer. The keyboard on the left has a slight waviness to it near the arrow keys as well, though that’s less noticeable. I could fix either of those things in Photoshop if I really cared about making it look perfect, but if my goal was just to show somebody what my desk looks like, it won’t hurt their understanding of the photo as a whole.

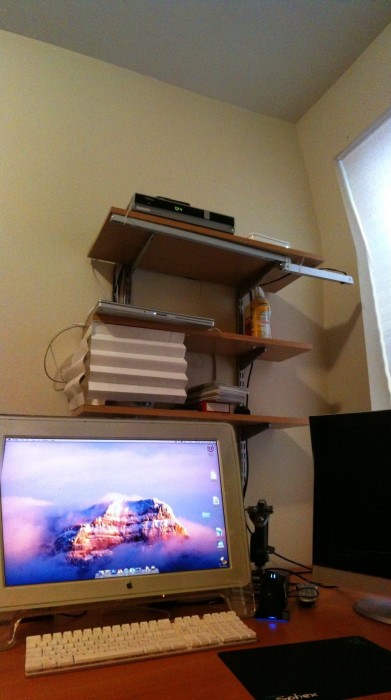
You also have the option of taking your photos in portrait or landscape. In the example above I used portrait mode, but the first photo of the rehearsal room was done in landscape. It just depends on what you’re trying to include and how many photos you want to take to cover that area. You can also use pano to include more vertical space than you could otherwise, as shown in this quick-and-dirty thing:

I have two complaints:

  • If you are interrupted while constructing your panorama, and have to leave the app, it will not save your progress, so you have to start over with the first shot.
  • The camera doesn’t support the advanced tap-to-focus features of the 3GS, which gives you less flexibility in getting a clear shot than you would get with the default camera app. Not sure if this is a limitation Apple places on third-party apps, or an oversight from the developer, but my guess is it’s the former.

What I find most useful overall is that at the most basic level, I am in the business of transmitting information. Pano allows me to convey more information in a photo than often is possible with a camera alone, which gives the recipient a greater understanding of the situation in question.


Review: Razer Sphex Mousepad

I call this: computers,gaming,tech — Posted by KP @ 6:10 pm

I’ve had this mousepad a really long time, and never got around to reviewing it. Which is probably the better way to write a review, after you’ve had a product for like a year, and actually have experienced it in many different situations.

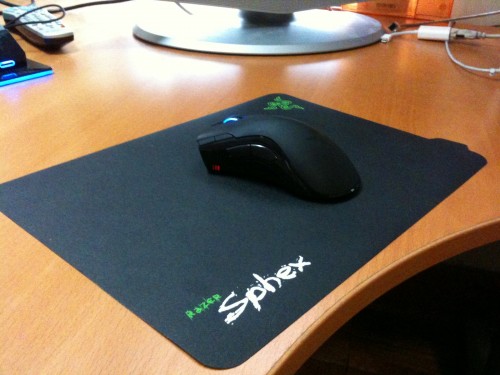
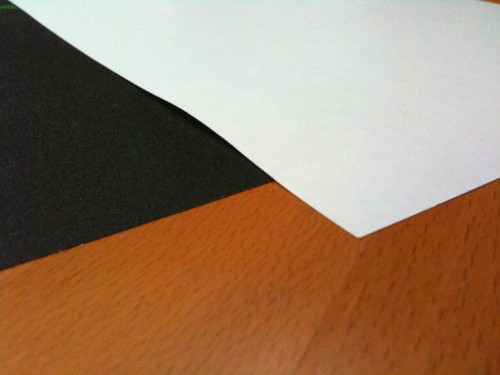
The concept of the Sphex is that it’s really, really thin. It’s about the thickness of a piece of paper. After much scientific study with my fingertip, I have determined it’s actually the thickness of two pieces of paper, but I buy cheap paper. If you have some real quality stock of paper, it might be just one. The point is, it’s so thin as to be almost imperceptible on your desk. The other very nice feature is that Razer has priced it very well. It’s only $14.99, which for a gaming-grade mousing surface is about as cheap as they come. Knowing Razer’s penchant for making high-quality gaming devices, but with prices that reflect their quality, when I first read about it I figured it had to be at least $30. I was very impressed that they made it so affordable.

It’s Thin

There are several advantages to how thin it is. It feels a lot less constricting when playing, because the edges of the pad don’t get in the way of your hand. The pad is relatively small for a gaming pad, but I don’t use really big hand motions so it’s fine for me. I also love it because I tend to move things around on my desk, while working and while playing. Sometimes I want to put my laptop down on it, or overlap my keyboard on top of it. Definitely when gaming, I sometimes need to place my joystick and throttle on the portion of the desk normally reserved for the mouse. In all of these situations, I can place anything over it without creating an unstable surface because it’s so thin. It’s more like a differently-texture section of the desk, rather than a separate object. Right now while typing on my laptop, my left forearm is resting on the corner of it. With a regular mousepad that would be annoying, and I’d need to shove it out of the way, but I don’t even notice it.

Being a Razer product, naturally it’s fine-tuned for gaming, and the surface is made of the proper texture to provide good tracking for optical and laser mice. The texture thing can be a personal preference. Some people like their mousing surface really smooth for quick movements, some people like more control, so a more pitted surface that slows down the mouse but allows the sensor to more accurately track its position is better. And then there are those who like soft cloth mats for lots of control, but this is not that. It definitely feels like a hard mat, and leans a little more to the “control” type of texture, which I like.

Because it’s so thin, there’s no room for rubber or anything to keep it in place, so the entire mat is covered in a gentle adhesive. It arrives with a plastic backing which peels away. There’s a little tab on the side of the mat that is not sticky, so you can peel it up easily to move it. The adhesive is not too strong, just enough to keep it from going anywhere when pressed onto your desktop, and is intended to be reusable.

Here is a picture of the Sphex vs. a piece of paper:

Portability

I always tour with a mousepad. First of all, I’m just that kind of gamer. I’m aware of the impact my mousing surface has on my gaming, and I want my favorite surface with me all the time. Also, in a hotel you never know what kind of desk you’re going to get from day to day. It might be something really inappropriate, like glass, in which case you’ll probably wind up mousing on top of a brochure about historic Chattanooga or something.

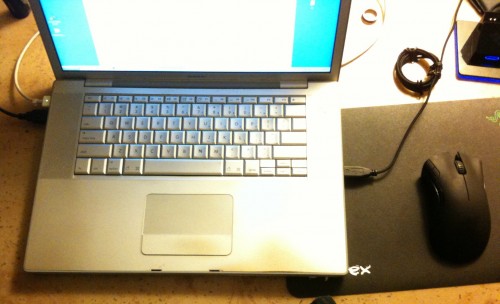
Speaking of Chattanooga, I found this picture that I inexplicably snapped there, of my laptop set up for gaming. The table wasn’t even the kind of work-friendly desk hotels usually give you. It was just a round table, that tapered off quickly outside the photo frame. In this case I am demonstrating how handy it is to be able to overlap your computer (or keyboard, in the case of a desktop) with the mouse pad when working in tight quarters. Incidentally, it also demonstrates why I’m so glad my new Macbook Pro has both USB ports on the left.

But mostly, the main reason I always bring a mousepad is to protect the mouse, which is the real investment. A $125 mouse that’s treated like a $20 mouse will start to perform like a $20 mouse when it gets all scratched up or used on a dirty surface. So I always make sure before I use the mouse that the mouse pad is perfectly clean and smooth, and nothing that can cause damage (food and drinks, objects that could scratch it) is ever put on the mouse pad.

Using a mouse pad also protects the surface from getting scratched by the mouse (which is sort of like saying that not keying a Ferrari protects the keys from getting paint on them), but especially with heavy gaming, it’s good for your furniture, and respectful of other people’s furniture if you’re in a hotel, dorm room, or any other place that’s not yours.

I both love and hate touring with this mat. First of all, I love it because it’s so light. For the purposes of packing, its weight is completely negligible. My previous mat was backed in aluminum, which added a little bit of weight and rigidity to the packing of my backpack. It wasn’t a huge problem, but replacing it with something weightless and flexible was a big improvement. Obviously this is a precision surface and you don’t want to pack it somewhere where it will get crushed or bent, but it has a little bit of give to it, and that’s helpful sometimes. I usually pack it in the section of my bag intended for papers and stuff — most laptop bags have a file-holder divider for this purpose. I’ve usually got a few papers in there (pay stubs, hotel receipts, schedules), and will pack the Sphex between these papers so it’s got a little protection against anything that might rub against it in the bag.

The one drawback for touring is the need to use the adhesive. I kept the plastic backing around because I knew this mat would need to move a lot. So whenever I travel with it, I try to make sure both sides are free of debris, and then carefully align the plastic with the back so all the sticky parts are covered. After many travels, the adhesive loses a lot of its stickiness. I notice it mostly in the fact that the plastic will no longer stick to all of it. If you look closely in the photos above you can see places where it’s lifting off the desk a tiny bit. There’s still enough adhesive on the mat to keep it from sliding around, but there are regions of it that have become worn down, either because the adhesive came off on the surface it was on, or it has attracted some dirt. I should mention that occasionally it will leave a some residue on a desk, which can be cleaned off, but on my home desk sometimes that takes a lot of effort.

However, there is one way to help this problem, in that the mat is designed to be washable. Yes, you can wash it with water and a little soap, and it will clear the dirt off the adhesive side, but I find that it doesn’t go back to being as sticky as when it was new. I figure that’s probably a result of some of the adhesive actually coming off, rather than being covered in dirt.

Longevity

My recommendation on moving around with it is that it is definitely reusable, and would be perfectly fine for moving a couple times a year, but if it’s your job to be in a different city every day, or you go to LAN parties where your rig is constantly being set up somewhere new, you might get frustrated by it. However, if the prospect of gaming on such a thin surface seems really exciting to you, it might be worth it. Also, the price is low enough that if you really care so much about your gaming experience, it’s not going to break the bank if you have to replace it eventually.

Actually, if I was really going to be thorough, it would be a good idea to have one that stays at home in perfect condition, and one for travel. Any bumps on a mousing surface — either on the mouse skates or the pad — create jittery movement for your game, and a tiny particle of dirt stuck under the pad could create a noticeable bump when playing. I always do my best when re-applying the pad to make sure the table is perfectly clean, and there’s nothing stuck to the adhesive, but the more it moves the more chances there are for imperfections.

Summary

Overall this purchase is one I am completely happy with. The only drawbacks to it are a result of my lifestyle not really being suited for the way the mat works, and even then it works pretty well. I’m not sure if I could ever deal with a mouse pad getting in my way again. It’s got all the advantages of mousing directly on your desk, but with the advantages of using a mouse pad as well: you won’t damage your desk or your mouse, and you have a surface designed to help your mouse track better.


May 5, 2010

My Secret iPad Weekend Revealed!

I call this: computers,mac,tech — Posted by KP @ 3:33 am

The new iPhone prototype isn’t the only secret in town. For the last several weeks, I have been part of a vast interstate conspiracy. My co-conspirator, who I will refer to by her code name, “Mom,” had enlisted my help to pull off the greatest Apple-related surprise of all time: to buy my Dad an iPad.

That may seem really simple, but I assure you, it wasn’t.

First of all, you must understand why this mission was so important. Dad had been in the hospital a few weeks back, and had to have a couple operations, and he’s been generally immobile and uncomfortable for weeks. When he first had his surgery, Mom felt bad and decided that although they otherwise wouldn’t really have the budget for an iPad, life is too short not to have one, and he really needed something to cheer him up and keep him occupied during his recovery. And honestly, my parents are the perfect audience for the iPad (I am not), and I’d been telling them this for… well, as long as we’ve known about the iPad.

First Complications

Mom called me up while he was still in the hospital because she wanted to get one right away, and wanted my advice about which one, and would need my help setting it up over the phone. I hopped over to the Apple site to check the specs and everything, and was hit with the first major roadblock that I hadn’t even thought about: it requires USB2. Both my parents’ Macs are from early 2002, just a few months before Apple began shipping computers with USB2.

Dad has an iMac that he got from his old job, which wasn’t even that great of a machine when it was new. It doesn’t even have a DVD drive, which is why it’s still running Panther. Panther. I don’t think it’s really possible to anticipate the frustration that causes when trying to work with it. Like he wants to know why he can’t open some websites. I said, “probably you’re running a really old browser, and it just needs to be updated.” Well guess what, you can’t get an updated version of Safari on it, and you can’t use Firefox 3 either. I had been planning on my next visit to try and get DVD sharing working to install Tiger, which might barely run.

But in light of this USB problem, it was obvious that something more drastic needed to be done about this whole ancient-computer problem. Mom was practically ready to go out and buy him an iPad and a Macbook. But by this time, Apple had just released the i7 Macbook Pro, and my current machine had been showing enough signs of imminent death that I knew I had to buy one the day I got home from tour. So I said, “Look, I’ll have a new computer by the time I get home, my Powerbook isn’t much newer than the ones you have, but it’s a lot more advanced, and it will be a lot better than what he’s using now, and I won’t need it.” The problem would have to wait a couple weeks until the tour was over, but we had an economical solution.

Secondary Complications

While my computer was dying for the last three weeks of the tour, I called a lot of Apple Stores. Every city we were in, I knew how close the nearest Apple Store was, and if they had 15″ 2.66GHz Hi-res anti-glare Macbook Pros in stock, just in case I needed one. While doing this, I also inquired if they had iPads, since if I ended up buying the MBP I would just buy the iPad at the same time. This revealed the second complication: you couldn’t find an iPad anywhere. Now Mom and I were getting worried that we wouldn’t be able to get one before my totally-not-suspicious visit on my birthday. I forgot to mention, we had planned that to be the day of the surprise.

When I got home, a week before the planned surprise, I began working the four Apple Stores in New York (I had been calling the flagship store on Fifth Ave. the whole time, pretty much any time I called another store, to see what my odds were like at home). I already had my Macbook Pro because the old one died completely in Philly. An employee at Fifth Ave advised me that they get surprise shipments all the time, but usually sell out in a couple hours, so my best bet was to just keep calling and if I hit a time when they were in stock, race to the store and get one.

I took this past Friday, April 30th, off from my search, because it was the day of the release of the 3G iPad, which I did not want, and I knew all Apple Stores would be a madhouse (and actually shut down for a couple hours in the middle of the day to prepare for the event).

But my hunch was that my last opportunity, Saturday, would be my best bet, as the availability of the 3G iPad would dilute the demand for the wifi one, and that stores probably received a big shipment of both for the launch of the 3G.

So when I got up on Saturday I called the closest store — the new one at Lincoln Square. They did indeed have wifi iPads, but only 16GB. I wanted 32. But it was an option. I would have to confer with Mom. But first I called Fifth Ave. The guy I spoke to said, “We have limited quantities of the 64GB.” Soho and 14th Street were plain sold out. So I called Mom (after spending a good five minutes on the phone talking to Dad while Mom finished watering the plants or something, trying not to give away my urgency in talking to her.) When we got on the phone in privacy, we conferred about our options, and decided that the 16GB would probably be too small at some point, so it was better to go for the 64, if any were still left, so that we could go ahead with the surprise.

So I raced down to the Fifth Ave store, which was absolutely insane on a Saturday afternoon. There were so many different iPad lines, and I was sent to the wrong place at least four times before I found the right line. Unlike the stores I visited on tour, or even the other ones in New York to a certain extent, which are selling their wares to the local neighborhood, the Fifth Ave store is really where the whole world comes to buy an iPad. Now I’m not just competing against the entire population of New York, but apparently also France, Japan, Latin America, and who-knows-where-else.

After a stressful time on a long line, I finally made it to the front, and was sent off to a corner register near the Genius Bar, all alone, where it was suddenly quiet and serene.

“Which one would you like?”

She reaches to the shelf behind her and selects a simple white box and places it on the table. Scans it with the fancy new iPhone checkout machine.

“Credit card?”

“ID?”

“Sign here with your finger.”

“Is an email receipt OK?”

“Here you go.”

And I put the bag into the messenger bag I had selected specifically for its iPad-sized carrying properties, and disappeared into the Central Park afternoon with my precious cargo.

Success!

When I got upstairs, I took out my phone (where my receipt had just come in — I checked it showed the correct model of iPad) and shot off a quick email to Mom simply saying “Mission successful! On my way home.” We had agreed weeks earlier not to say too much in emails just in case Dad should come by her computer. Now Mom checks her email usually a couple times a day. Clearly she had been checking it obsessively since I called her, because five minutes later she wrote back — in all caps — about what a wonderful daughter I was.

As I made my way home, I felt like I was a secret courier carrying sensitive spy materials over some border. Finally I got home, and very, very carefully did the unboxing. I really wanted to preserve as much of the unboxing experience as possible for Dad, so I cut the shrink-wrap so that only the bottom came off. I used my cable so that all of his accessories could stay wrapped up, and I found to my delight that the iPad touchscreen could be used through the plastic cover that wraps around the whole device itself. I carefully lifted the flap at the bottom so it could be plugged in.

The next 10 hours were spent preparing it in every detail possible. Part of the surprise, maybe the hardest part, was that I wanted to hand him this magical and revolutionary slab of awesomeness, and it would already be filled with all his music, his favorite movies, some TV shows, the most necessary apps, and some books he might like (we have a very similar taste in books, which is helpful).

Some CIA Stuff

The original plan would have required at least several hours at my parents’ house to transfer all his files from his old computer, and then sync everything to the iPad, while hiding the fact that anything was going on.

But when I got home with the iPad and called Mom, we got on iChat, and she helped me to set some stuff up. Dad knew I had been planning to install Tiger and do some major work on his computer on my next visit, so on that pretext, Mom turned on his computer, and while screen sharing through iChat (which is a really awesome, Apple-like, just-works implementation of VNC) I then installed a VNC server on his computer and — get this — using VNC to control my Mom’s computer, used VNC to control my Dad’s. So it was like a screen within a screen within a screen, which was kind of confusing at times. You have to remember, he’s on Panther, so I can’t just do iChat screen sharing with him.

Anyway, much to my relief, his iTunes library was only a little over 2GB (which surprises me). Through a mix of several methods, over the course of many hours, I uploaded and downloaded his entire music library onto the Powerbook. I used three methods simultaneously: iChat file transfer, uploading to my iDisk, and uploading to my website FTP. In this way I hoped to overcome the bandwidth limitations of each. It seemed to work OK, I guess.

I also took his contact file from Entourage and imported it into Address Book on the new computer. I set him up with a GMail account, because they have Optimum Online as their ISP and the email it comes with is from the dark ages, only supports POP, and only supports SMTP from your own house connection. Dear God, if you must use them as your ISP, don’t ever try to use the email, just get a free account from Google or Yahoo or something.

While all this was going on, I bought him some movies and apps with my iTunes account (thankfully Apple has finally instituted the ability to give a specific app as a gift), and then activated them on his new computer.

The most important part, I told Mom, was keeping him away from his email while all this was happening. No doubt the process of registering the iPad, being gifted apps, and downloading free apps, would trigger a series of emails from Apple, like the one that came through this morning entitled “Your New iPad.” To ward against this, I added a rule to Entourage on his current computer that if any mail came in with the sender, subject or message body containing “Apple,” “iTunes” or “iPad” it would be immediately marked as read and moved to the spam folder.

When all was said and done, both the computer and iPad were set up and ready to go. Mom said I should work for the CIA. But as I told her, I don’t think the CIA would put me to work doing something as innocuous as surprising somebody with an iPad. I should also mention that this kind of work is much easier when you know all of your quarry’s passwords — or at least have access to his computer and the administrator password to check his keychain.

OK, OK, the iPad!!

So the bonus to this exciting experience of course was getting to spend about 10 hours playing with the iPad. Some thoughts:

PROS:

  • Very pretty. It feels very solid and well-built. Typical Apple.
  • One of the movies we got for him was Avatar. We just watched a minute of it. The HD video is amazing.
  • The UI for the default apps is great. I especially wish I could have a calendar that’s so easy to read on my iPhone. Just having a week view would be wonderful. I set up accounts for my parents on my Google Apps domain so they can subscribe to my work calendars and see where in the country I am, when I have shows, etc. Seeing my schedule on the iPad was really cool. It’s the one thing I’m really jealous of.
  • The iBooks app is really nice. I like that they have brightness controls easily accessible. On the night the iPad spent with me, I will confess I read a book sample chapter in bed, just to see what it was like. It’s by far the best ebook-in-bed experience I’ve had.

CONS:

  • It is kinda heavy. At times my wrists were getting tired from holding it a certain way. But I think some of that may be because it was still in plastic and I was holding it very delicately so as not to smudge or wrinkle the plastic. When reading in bed I rested the iPad on my stomach. Holding it up for a while probably would have been annoying.
  • Doesn’t come with some of the default apps from the iPhone (weather, stocks, calculator, etc.). I don’t consider this a con so much, as a lot of people end up replacing those apps with something better anyway, and there are several free options. But the big one is no Clock app. This is more important because until third-party apps can multitask, there’s no way to set an alarm that will stay active if you leave the app. I know the iPad is not an iPhone, but this seems like a feature you’d still want no matter what. If Mom had an iPad in the kitchen she’d want to set a timer for the oven or whatever, and then hop over to the iPod app or something while waiting for it to go off. That seems like a big oversight to me. Hopefully in a few months OS4 will come out for the iPad and it will be a non-issue.
  • Summary

    Well Dad was completely surprised, and thrilled with his gift. When handed the package, he thought we had gotten him some sort of computer accessory, but he’s savvy enough to know that when he opened the wrapping and saw “64GB” on the back of the box, there were a very limited number of things that size that contain that kind of storage.

    The whole event was basically a big Apple commercial. He has learned from years of working with Macs and iPods that you don’t need an instruction manual or technical knowledge to work something, and you won’t break it by trying things out. He just started poking around exploring how to make things work, and discovered things I hadn’t found yet either. The biggest discovery was that on the iBooks app, the page-turning animation actually changes based on how you “grip” the page with your finger (i.e. if you turn from the top it shows the top corner curling over, and so forth, basically mimicking perfectly whatever motion and speed you make with your finger).

    From my perspective, I still feel that the only time I would really use an iPad would be in bed. It would be great for reading, watching videos, and light web surfing without having to drag my entire laptop into bed, or squinting at the tiny screen on my phone.

    My fears about having yet another device to keep in sync were pretty much eliminated. Most of the syncing I would care about is over-the-air, and I wouldn’t mind plugging it in to sync new apps and media with my Mac any more than I do with my phone. If money was no object, I’d probably get one (with 3G), but I can think of very few occasions where I would take it with me out of the house, in place of my MacBook Pro.

    All that being said, when the day was over and it was time to go home, I was rather sad to leave it behind, even though I have no idea what I’d really do with it. And that, my friends, is what they call the Reality Distortion Field.


The Space Pen: A Stage Manager’s Best Friend

I call this: theatre — Posted by KP @ 2:42 am

If you’re a stage manager, maybe something like this has happened to you:
You’re out at dinner with your cast or crew, and at the end of the meal everybody is paying with credit cards and the waiter drops off the receipts and doesn’t have, or forgets to leave, a pen. Then everybody looks at you — and this is one of those evenings, you’ve dropped all your stuff at the hotel or whatever and are enjoying the rare opportunity to just go somewhere without lugging all your crap — and you don’t have a pen. And then everyone else at the table is like, “What? A stage manager without a pen?”

You may mutter something about not being at work, but then secretly you spend the rest of the outing suspecting that you may be a failure as a human being because you are at once a stage manager, and not within reach of a pen 24 hours a day.

This exact event has happened to me a lot in life, but as a kid who used to wear a pocket protector in my Catholic school uniform shirt (simultaneously with a fanny pack, while lugging an overstuffed backpack as big as me), I have fought hard to convince myself that it’s OK not to carry the kitchen sink on my person at all times.

Recently the above situation happened several times in one week, and aside from the embarrassment, the actual inconvenience of not having a pen started to get to me, and I decided that it’s time for me to suck it up and carry a pen everywhere I go. I already knew which pen it would be, one that I already purchased for this purpose years ago, but didn’t adopt steady use of.

Ever since I forced myself to start carrying it all the time, I have been surprised how many times it’s come in handy. Sometimes I forget I’m carrying it, and it’s been very exciting to discover, “wait, I do have a pen!”

I don’t want to recommend a specific pen too strongly, any compact pen would be better than none, but this one is a very good choice. It’s very small and smooth so it fits comfortably in the corner of my front pants pocket, it has a clip so it won’t fall out, and it’s a matte black so you can always be wearing it, even in show blacks. It’s very small when the cap is on, but very well constructed so that it is full sized and well balanced when you are writing with it.

Being a space pen, it can write for long periods against walls and at other odd angles you sometimes end up needing to write on backstage, as well as on wet paper (such as drawing on a cocktail napkin when having a debate with your crew), in extreme temperatures, and, if your show should be going on a really expensive, really long-distance tour, in space.


April 22, 2010

Macbook Pro i7 Review

I call this: computers,mac,tech — Posted by KP @ 11:53 pm

Today between shows I purchased the new 2010 unibody Macbook Pro with Intel’s new i7 processor. My faithful 2007 Macbook Pro finally gave up the ghost from the screen problem it’s been having for the last six months or so.

First Impressions

It’s so pretty. Throughout all of this you have to remember that while I have a lot of friends with unibody Macbooks, most of my experience is with the older style body, so there are things here that are new or unusual to me that will not be shocking if you own a more recent model.

I love the rounded curves. It feels so much thinner. The unboxing experience was very simple, but even expecting Apple’s typical style, I had to stop and admire it, despite the fact that I was in a huge rush to get it up and running before the evening show. I failed miserably at that, by the way. I didn’t even get as far as finishing the clone of my old drive.

I just can’t get into the black keyboard. I’m still firmly in the phase of adjusting to a new tactile experience, and I think like most people I will soon prefer typing on it, but black plastic in the midst of an otherwise characteristic Apple design of sleek aluminum is weird. It’s like something you’d find on a PC, slapped in the middle of the most Apple-like hardware you could imagine. I mean it’s a single slab of aluminum, with a trackpad. It doesn’t even have a mouse button. The speaker holes are so tiny you can barely see them. Even the power button is trying to hide in the corner hoping no one will notice it. And in the midst of all this cutting-edge design, the keyboard is black plastic. I’m going to assume Jonathan Ive is smarter than me, but I don’t get it. I can only imagine he wanted something else and it was impractical, and for some reason white plastic looked worse — maybe because it would be harder to make it light up, or look good when lit up. I also recognize that the glossy screen (which is the way Apple obviously intended this model to be seen) has a black border, which would make the black keys look a little bit less like they wandered in off a Vaio.

Screen

I got the 15″ high-end model (2.66GHz) with the hi-res anti-glare screen. The first thing you should know: this is not a build-to-order option — you don’t need to order it online. Which is important because I’m reading that people ordering them online are being told there are shipping delays on the anti-glare screen. I called Apple Stores in the last three cities we’ve been in, while my MBP was gasping its last, and every single one of them had this model in stock. In many cases they only had the 2.66GHz one, not the lower-end 15″. But if you want the one I have, you can just walk into a store and get it.

I’m not ashamed to say I’m one of those snobs who won’t use a glossy screen, because it’s so important for my “design work.” And it’s just annoying. Apple discontinued the matte screen in most models for a while, and I’m not sure how many iterations of the feature they’ve gone through since then, but to dispel any rumors, it is indeed a matte screen, despite the fact that they’ve changed the nomenclature to “anti-glare.” I don’t want to poke it too hard, but it looks to me to be the same type of screen the older matte models have. It’s not a glossy screen with a coating or anything horrible like that. As far as my eyes can tell, it’s the same kind of screen that used to be default on all their laptops.

One fact Apple doesn’t much advertise is that the matte screen still has the silver border around it like the older Macbook Pros and Powerbooks, not the black border that many people think looks very slick on the glossy screens. This has to do with the fact that the sheet of glass on the glossy screen can hold everything in in one unbroken expanse of screen, but the matte screen needs some support to hold it in. I’m not bothered by it in terms of design, but I must say that given how sexy the body design of the unibody is, I was disappointed to find that the silver bezel is actually wider than on my old one. The screen is the same size, but in some ways it looks smaller or more low-tech because it doesn’t have a fancy thin edge around it. The glossy screen’s edge isn’t that thin either, but black is slimming, and the glass extends all the way across the surface, so people don’t tend to notice. My new screen also has a black piece of rubber all around the outer edge, which probably does awesome things in regards to making it close nicely, but the black against the silver also accentuates how fat the border is.

Size

I’m sure the above situation was necessary not because of how the screen is made, but because of the width of the base, which must need to be that wide to hold all the internal components in such a thin package. Obviously the lid needs to be as big as the base, but a 15.4″ screen is a 15.4″ screen, and if the lid gets bigger, there will be more blank space around the edges.

I was surprised, when I tried to pack up my old MBP for travel in the new one’s box: the box has a form-fitting cutout for the computer, and I was sure it wouldn’t fit. Actually the old one fits inside with room to spare. It’s much taller, but the box doesn’t care about that. In two dimensions, at least, the unibody is bigger. My first reaction was how hard it can be to cram it onto a calling desk already, now I’ve got additional millimeters to worry about. It also explained for me why I often see the models in the Apple Store and think I’m looking at the 17″ (because it’s bigger than mine), but it’s really the 15″. This is why I decided the 17″ was a bad idea, despite considering it last year.

Little Details I Am Just Getting

These are old features, but they are new for me and make me happy:

  • Multi-touch trackpad! Basically the one feature I wished my old MBP had. The best part of this is the four-finger up-or-down swipe, which does two different kinds of Exposé. Now I can stop using my F-keys as F-keys and let them perform the special tasks they’re intended for like playing music and adjusting brightness, since I don’t have to devote any of them to Exposé. Other features I will use a lot include forward and back browsing, and zoom in and out.
  • iPhone headphones control music playback. This is just a nice detail. I actually forgot my 3GS headphones (with the volume buttons) on this leg of the tour, so I have been using my backup pair (with just the play/pause button) for the last month or however-the-hell-long we’ve been out here. So I haven’t been able to test the volume control, but I’m very excited to.

The old Switcheroo

Just getting to the point of playing with it was a big ordeal because of the way I wanted to set it up. I bought a new hard drive for my old MBP right before going on tour, about six months ago. It’s 320GB, 7200rpm. I felt that the slow HD speed was the bottleneck on the computer’s performance, so I was very happy to upgrade it. I’m still totally satisfied with it, both speed and capacity-wise, so I wanted to install it in the new machine, and take the stock 500GB 5400rpm drive and put it in the old machine. Because of the differences in hardware and related system files, you can’t just swap them and turn the things on, so it involved a lot of booting in firewire mode to shift all the bits and bytes around (see the comments for another perspective).

When I opened up the back to change the hard drive, I was struck by how orderly and tightly packed everything is. We heard all about this in some Steve Jobs keynote years ago, but seeing it in person (after just opening my old MBP, which is not quite as tidy and densely packed inside) really emphasizes how much care Apple put into creating as small a package as possible with as many features as possible.

In case you’ve arrived here interested in the hard drive swap, here’s the order of operations.

Swapping the hard drive in your new Mac for your old one

  • Do an additional external backup of your old drive (Time Machine or whatever)
  • Put the new computer in target disk mode by holding “T” while it boots
  • Connect the two computers by firewire
  • Using Disk Utility, format the new disk for Mac OS Journaled
  • Using a utility like SuperDuper (free), make a bootable clone of your old drive onto the new drive
  • Shut down both computers, and physically swap the drives (find instructions online for how to do that with the model you have — on older ones this will void the warranty)
  • Boot the old computer (containing the new drive, which is now a clone of the old one). It should boot perfectly, as if nothing has happened.
  • Turn on the new computer in target disk mode, and connect the computers using firewire.
  • Using Disk Utility from the old computer, format the old drive (which is in the new computer) as Mac OS Journaled.
  • Eject the firewire connection from the old computer, and disconnect the cables. Shut down the new computer.
  • Insert your Mac OS install DVD into the new computer (if it’s shut down it won’t go all the way in, but it will be sucked in upon booting).
  • Power on the new computer, holding down the “C” button to boot from the CD.
  • Follow the regular Mac OS install proceedures.

Speed?

Rule #1: I hate benchmarks. They bore me. My assessment of hardware generally falls into three results:
1. OMG holy shit that’s fast!
2. Fast enough
3. Slow and it pisses me off!

I have been really busy this week, and haven’t actually done anything more than what I need my computer for to do my job and some casual web browsing. I haven’t touched my Windows partition yet. I’m kind of scared, because it’s the one from my old MBP.

When I have opinions about more demanding processes I will update — certainly when I get around to gaming I will have opinions — but if you want benchmarks, there are many sites that specialize in that better than I ever could with my limited number of models to test — so that, combined with the fact that I don’t even care enough to read their analysis in depth, much less write my own, is why you will not find it here.

Update:
I’ve now had the machine for almost three months, and my assessment is that it’s good but not incredibly noticeable during normal use. Maybe the bottleneck is still the hard drive, and that’s why it feels exactly the same as before. My hope when I bought it was that maybe a year or so later, an SSD drive of respectable size would be available for a reasonable price. And I’m sure sometime around then, 8GB of ram would be really cheap. I haven’t quite mentally grasped the situation of 8GB being a “normal” amount of RAM yet, but when it’s cheap enough, I’ll buy it just because, and maybe I’ll see why. When I bought my last MBP I bought 4GB of RAM (which was relatively expensive at the time) because I was using the machine to run full-motion-video-with-audio projections for Singin’ in the Rain, and it made an enormous difference overnight — just before we opened we increased the resolution of all the videos, and they looked much better, and played much more smoothly. So I’m sure with the quad core and everything else, this thing has more power under the hood that I would find if I was doing more video and other demanding activities.

Gaming on this machine definitely feels smoother. Compared to my last MBP, its performance reminds me more of my home PC. That’s not to say it’s as good as a full PC, but it’s more similar. My PC also was last upgraded in 2008, so it’s not cutting-edge.

I’ve also been wondering more about buying Windows 7. Of all the things to drop a couple hundred bucks on, Windows doesn’t sound like the best investment, but I’m starting to feel like it might be approaching the point where the advantages of an OS that can support more than 3GB of RAM, and other advanced features of the hardware, is more helpful than the possibility of incompatibility with games and gaming hardware. I still think XP is solid, for what I need it for at least, but I’m starting to feel how old it is, especially because a lot of the newer games require at least Vista. I think trying Windows 7 on this machine might be a good way to start out with it, before screwing up my gaming rig.

Battery Life

In addition to my lack of patience with benchmarks, I also don’t feel the need to sit around with a stopwatch calculating battery life, especially when there are many kinds of activities that can have an impact on how quickly the battery is drained. What I will say is that after a full day of using the computer off the battery during two shows, the little picture of the battery in my menu bar was showing it getting very close to running out (maybe a quarter of the bar full). When you click on said icon, it estimates the actual time remaining. What, percentage-wise, was “almost run out” was estimated at over two more hours of run time! Now bear in mind that I haven’t been using the machine that long, and the system may or may not be smart enough to have properly calibrated the battery without a full charge cycle. But it’s funny that with a 9-hour battery life (basically double that of my last computer), what used to mean “time to plug it in” now means something entirely different.

Update:
The battery got amazing life on the first day at work, as I said. After that it went through some period where it was more like 5 hours for a few charge cycles, which had me worried. But that first day the wifi was off because the theatre’s wifi sucked, and there were few apps running in the background, so who knows how many factors may have been different. I don’t think it’s reasonable to expect to get 9 hours during normal use. With your wifi and bluetooth off, brightness down, and not running any apps that engage the Nvidia video card (some of which are completely nonsensical — my RSS reader triggers it!), then it’s a possibility. With more heavy usage, I think 5 hours is probably about right. I very often get through a whole work day without plugging it in, because I’m a little careful with pacing my usage throughout the day. For a performance, you can run it the whole time, no problem.

External Display Disappointment

One thing that has been a complaint about recent Macbook Pros is that Apple did away with the full-size DVI video-out port, and has switched to Mini Displayport (MDP). What this means (theoretically) is that you now need a new adapter (which inexplicably doesn’t come with the computer, where before you always got one or two most common ones for free). But if you’re thinking “OK fine, I’ll get the MDP to DVI adapter, and then use my old DVI adapters, and I can connect to anything,” you’re in for some disappointment.

While not indicated on the packaging anywhere (although the baggie is clear and you could just look at the connector), the MDP-DVI adapter does not support DVI-I. In practical terms, what that means is that the four little pins that surround the big horizontal pin are not supported. The female end of the connector only has a slot for the horizontal pin, so if you have a DVI-I connector you’d like to plug in, you can’t, because there aren’t any holes for those four pins. In more technical terms, DVI-I supports analog as well as digital connections (so in order to connect to VGA or RCA equipment, you need that analog signal). So although the packaging just says “DVI” all over it, it is very specifically DVI-D.

So OK, now you’re thinking, “Alright, so Apple gets me to buy a bunch more $30 adapters so I can connect to all this different stuff.” Well, no. Apparently not. See, as far as I can tell, some of those adapters don’t exist. First of all, there is no adapter that supports DVI-I, so there’s no hope of chaining it to your old adapters (which would probably be bad for video quality at some point, but if you’re stuck between “works” and “doesn’t work” it wouldn’t be a bad fix). Also, I see no MDP-RCA adapter listed on the Apple site. There is an MDP-VGA, which I have recently purchased, which works fine for using my Samsung TV as a second monitor. I think Apple then expects you to get an adapter somewhere else that goes from VGA to RCA or S-video.

All I can say about these cables is be very careful. Apple has been bouncing around with various types of mini connectors on their laptops and desktops in recent years, so there’s a lot of Mini Displayport, Mini DVI, Mini VGA, etc.

Most of all, and I’m not sure if this is a defective product or by design, the MDP-DVI adapter I first bought does not work with my Apple Cinema Display. This is an old monitor from 2002, with an ADC connector on it, which is plugged into a KVM switch which can switch between two DVI inputs (from my PC and Mac) so I can share the screen and keyboard/mouse with two machines. It’s an unconventional setup, but the point is it receives its signal from DVI-D, it works with the other three computers in the house, and it should work. I get nothing. No indication from computer or monitor that anything is happening or plugged in. Now I have read on the reviews page for this item on the Apple site, that a number of people have purchased defective connectors of this type, and upon buying one (or sometimes more!) replacements, it suddenly worked fine. But I don’t have another DVI monitor to test with at the moment, so I have no way of knowing if it’s just a bad connector. But I intend to find out.


Older Posts »