HOME

April 22, 2010

Macbook Pro i7 Review

I call this: computers,mac,tech — Posted by KP @ 11:53 pm

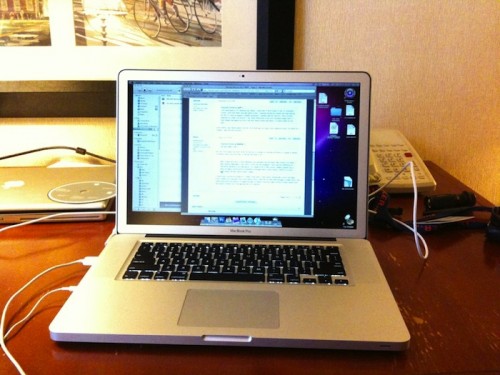
Today between shows I purchased the new 2010 unibody Macbook Pro with Intel’s new i7 processor. My faithful 2007 Macbook Pro finally gave up the ghost from the screen problem it’s been having for the last six months or so.
First Impressions

It’s so pretty. Throughout all of this you have to remember that while I have a lot of friends with unibody Macbooks, most of my experience is with the older style body, so there are things here that are new or unusual to me that will not be shocking if you own a more recent model.

I love the rounded curves. It feels so much thinner. The unboxing experience was very simple, but even expecting Apple’s typical style, I had to stop and admire it, despite the fact that I was in a huge rush to get it up and running before the evening show. I failed miserably at that, by the way. I didn’t even get as far as finishing the clone of my old drive.

I just can’t get into the black keyboard. I’m still firmly in the phase of adjusting to a new tactile experience, and I think like most people I will soon prefer typing on it, but black plastic in the midst of an otherwise characteristic Apple design of sleek aluminum is weird. It’s like something you’d find on a PC, slapped in the middle of the most Apple-like hardware you could imagine. I mean it’s a single slab of aluminum, with a trackpad. It doesn’t even have a mouse button. The speaker holes are so tiny you can barely see them. Even the power button is trying to hide in the corner hoping no one will notice it. And in the midst of all this cutting-edge design, the keyboard is black plastic. I’m going to assume Jonathan Ive is smarter than me, but I don’t get it. I can only imagine he wanted something else and it was impractical, and for some reason white plastic looked worse — maybe because it would be harder to make it light up, or look good when lit up. I also recognize that the glossy screen (which is the way Apple obviously intended this model to be seen) has a black border, which would make the black keys look a little bit less like they wandered in off a Vaio.

Screen

I got the 15″ high-end model (2.66GHz) with the hi-res anti-glare screen. The first thing you should know: this is not a build-to-order option — you don’t need to order it online. Which is important because I’m reading that people ordering them online are being told there are shipping delays on the anti-glare screen. I called Apple Stores in the last three cities we’ve been in, while my MBP was gasping its last, and every single one of them had this model in stock. In many cases they only had the 2.66GHz one, not the lower-end 15″. But if you want the one I have, you can just walk into a store and get it.

I’m not ashamed to say I’m one of those snobs who won’t use a glossy screen, because it’s so important for my “design work.” And it’s just annoying. Apple discontinued the matte screen in most models for a while, and I’m not sure how many iterations of the feature they’ve gone through since then, but to dispel any rumors, it is indeed a matte screen, despite the fact that they’ve changed the nomenclature to “anti-glare.” I don’t want to poke it too hard, but it looks to me to be the same type of screen the older matte models have. It’s not a glossy screen with a coating or anything horrible like that. As far as my eyes can tell, it’s the same kind of screen that used to be default on all their laptops.

One fact Apple doesn’t much advertise is that the matte screen still has the silver border around it like the older Macbook Pros and Powerbooks, not the black border that many people think looks very slick on the glossy screens. This has to do with the fact that the sheet of glass on the glossy screen can hold everything in in one unbroken expanse of screen, but the matte screen needs some support to hold it in. I’m not bothered by it in terms of design, but I must say that given how sexy the body design of the unibody is, I was disappointed to find that the silver bezel is actually wider than on my old one. The screen is the same size, but in some ways it looks smaller or more low-tech because it doesn’t have a fancy thin edge around it. The glossy screen’s edge isn’t that thin either, but black is slimming, and the glass extends all the way across the surface, so people don’t tend to notice. My new screen also has a black piece of rubber all around the outer edge, which probably does awesome things in regards to making it close nicely, but the black against the silver also accentuates how fat the border is.

Size

I’m sure the above situation was necessary not because of how the screen is made, but because of the width of the base, which must need to be that wide to hold all the internal components in such a thin package. Obviously the lid needs to be as big as the base, but a 15.4″ screen is a 15.4″ screen, and if the lid gets bigger, there will be more blank space around the edges.

I was surprised, when I tried to pack up my old MBP for travel in the new one’s box: the box has a form-fitting cutout for the computer, and I was sure it wouldn’t fit. Actually the old one fits inside with room to spare. It’s much taller, but the box doesn’t care about that. In two dimensions, at least, the unibody is bigger. My first reaction was how hard it can be to cram it onto a calling desk already, now I’ve got additional millimeters to worry about. It also explained for me why I often see the models in the Apple Store and think I’m looking at the 17″ (because it’s bigger than mine), but it’s really the 15″. This is why I decided the 17″ was a bad idea, despite considering it last year.

Little Details I Am Just Getting

These are old features, but they are new for me and make me happy:

  • Multi-touch trackpad! Basically the one feature I wished my old MBP had. The best part of this is the four-finger up-or-down swipe, which does two different kinds of Exposé. Now I can stop using my F-keys as F-keys and let them perform the special tasks they’re intended for like playing music and adjusting brightness, since I don’t have to devote any of them to Exposé. Other features I will use a lot include forward and back browsing, and zoom in and out.
  • iPhone headphones control music playback. This is just a nice detail. I actually forgot my 3GS headphones (with the volume buttons) on this leg of the tour, so I have been using my backup pair (with just the play/pause button) for the last month or however-the-hell-long we’ve been out here. So I haven’t been able to test the volume control, but I’m very excited to.

The old Switcheroo

Just getting to the point of playing with it was a big ordeal because of the way I wanted to set it up. I bought a new hard drive for my old MBP right before going on tour, about six months ago. It’s 320GB, 7200rpm. I felt that the slow HD speed was the bottleneck on the computer’s performance, so I was very happy to upgrade it. I’m still totally satisfied with it, both speed and capacity-wise, so I wanted to install it in the new machine, and take the stock 500GB 5400rpm drive and put it in the old machine. Because of the differences in hardware and related system files, you can’t just swap them and turn the things on, so it involved a lot of booting in firewire mode to shift all the bits and bytes around (see the comments for another perspective).
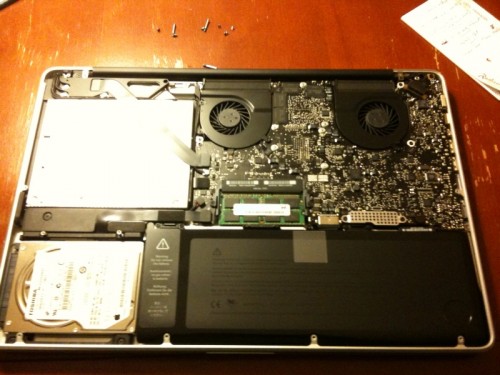
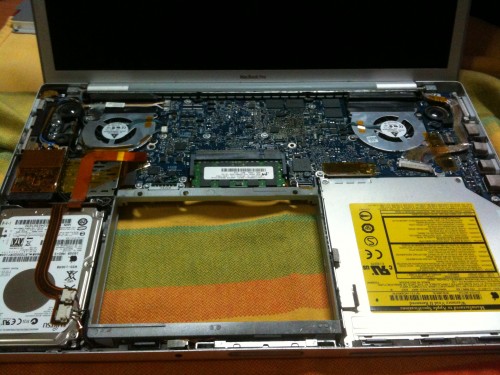
When I opened up the back to change the hard drive, I was struck by how orderly and tightly packed everything is. We heard all about this in some Steve Jobs keynote years ago, but seeing it in person (after just opening my old MBP, which is not quite as tidy and densely packed inside) really emphasizes how much care Apple put into creating as small a package as possible with as many features as possible.

In case you’ve arrived here interested in the hard drive swap, here’s the order of operations.

Swapping the hard drive in your new Mac for your old one

  • Do an additional external backup of your old drive (Time Machine or whatever)
  • Put the new computer in target disk mode by holding “T” while it boots
  • Connect the two computers by firewire
  • Using Disk Utility, format the new disk for Mac OS Journaled
  • Using a utility like SuperDuper (free), make a bootable clone of your old drive onto the new drive
  • Shut down both computers, and physically swap the drives (find instructions online for how to do that with the model you have — on older ones this will void the warranty)
  • Boot the old computer (containing the new drive, which is now a clone of the old one). It should boot perfectly, as if nothing has happened.
  • Turn on the new computer in target disk mode, and connect the computers using firewire.
  • Using Disk Utility from the old computer, format the old drive (which is in the new computer) as Mac OS Journaled.
  • Eject the firewire connection from the old computer, and disconnect the cables. Shut down the new computer.
  • Insert your Mac OS install DVD into the new computer (if it’s shut down it won’t go all the way in, but it will be sucked in upon booting).
  • Power on the new computer, holding down the “C” button to boot from the CD.
  • Follow the regular Mac OS install proceedures.

Speed?

Rule #1: I hate benchmarks. They bore me. My assessment of hardware generally falls into three results:
1. OMG holy shit that’s fast!
2. Fast enough
3. Slow and it pisses me off!

I have been really busy this week, and haven’t actually done anything more than what I need my computer for to do my job and some casual web browsing. I haven’t touched my Windows partition yet. I’m kind of scared, because it’s the one from my old MBP.

When I have opinions about more demanding processes I will update — certainly when I get around to gaming I will have opinions — but if you want benchmarks, there are many sites that specialize in that better than I ever could with my limited number of models to test — so that, combined with the fact that I don’t even care enough to read their analysis in depth, much less write my own, is why you will not find it here.

Update:
I’ve now had the machine for almost three months, and my assessment is that it’s good but not incredibly noticeable during normal use. Maybe the bottleneck is still the hard drive, and that’s why it feels exactly the same as before. My hope when I bought it was that maybe a year or so later, an SSD drive of respectable size would be available for a reasonable price. And I’m sure sometime around then, 8GB of ram would be really cheap. I haven’t quite mentally grasped the situation of 8GB being a “normal” amount of RAM yet, but when it’s cheap enough, I’ll buy it just because, and maybe I’ll see why. When I bought my last MBP I bought 4GB of RAM (which was relatively expensive at the time) because I was using the machine to run full-motion-video-with-audio projections for Singin’ in the Rain, and it made an enormous difference overnight — just before we opened we increased the resolution of all the videos, and they looked much better, and played much more smoothly. So I’m sure with the quad core and everything else, this thing has more power under the hood that I would find if I was doing more video and other demanding activities.

Gaming on this machine definitely feels smoother. Compared to my last MBP, its performance reminds me more of my home PC. That’s not to say it’s as good as a full PC, but it’s more similar. My PC also was last upgraded in 2008, so it’s not cutting-edge.

I’ve also been wondering more about buying Windows 7. Of all the things to drop a couple hundred bucks on, Windows doesn’t sound like the best investment, but I’m starting to feel like it might be approaching the point where the advantages of an OS that can support more than 3GB of RAM, and other advanced features of the hardware, is more helpful than the possibility of incompatibility with games and gaming hardware. I still think XP is solid, for what I need it for at least, but I’m starting to feel how old it is, especially because a lot of the newer games require at least Vista. I think trying Windows 7 on this machine might be a good way to start out with it, before screwing up my gaming rig.

Battery Life

In addition to my lack of patience with benchmarks, I also don’t feel the need to sit around with a stopwatch calculating battery life, especially when there are many kinds of activities that can have an impact on how quickly the battery is drained. What I will say is that after a full day of using the computer off the battery during two shows, the little picture of the battery in my menu bar was showing it getting very close to running out (maybe a quarter of the bar full). When you click on said icon, it estimates the actual time remaining. What, percentage-wise, was “almost run out” was estimated at over two more hours of run time! Now bear in mind that I haven’t been using the machine that long, and the system may or may not be smart enough to have properly calibrated the battery without a full charge cycle. But it’s funny that with a 9-hour battery life (basically double that of my last computer), what used to mean “time to plug it in” now means something entirely different.

Update:
The battery got amazing life on the first day at work, as I said. After that it went through some period where it was more like 5 hours for a few charge cycles, which had me worried. But that first day the wifi was off because the theatre’s wifi sucked, and there were few apps running in the background, so who knows how many factors may have been different. I don’t think it’s reasonable to expect to get 9 hours during normal use. With your wifi and bluetooth off, brightness down, and not running any apps that engage the Nvidia video card (some of which are completely nonsensical — my RSS reader triggers it!), then it’s a possibility. With more heavy usage, I think 5 hours is probably about right. I very often get through a whole work day without plugging it in, because I’m a little careful with pacing my usage throughout the day. For a performance, you can run it the whole time, no problem.

External Display Disappointment

One thing that has been a complaint about recent Macbook Pros is that Apple did away with the full-size DVI video-out port, and has switched to Mini Displayport (MDP). What this means (theoretically) is that you now need a new adapter (which inexplicably doesn’t come with the computer, where before you always got one or two most common ones for free). But if you’re thinking “OK fine, I’ll get the MDP to DVI adapter, and then use my old DVI adapters, and I can connect to anything,” you’re in for some disappointment.

While not indicated on the packaging anywhere (although the baggie is clear and you could just look at the connector), the MDP-DVI adapter does not support DVI-I. In practical terms, what that means is that the four little pins that surround the big horizontal pin are not supported. The female end of the connector only has a slot for the horizontal pin, so if you have a DVI-I connector you’d like to plug in, you can’t, because there aren’t any holes for those four pins. In more technical terms, DVI-I supports analog as well as digital connections (so in order to connect to VGA or RCA equipment, you need that analog signal). So although the packaging just says “DVI” all over it, it is very specifically DVI-D.

So OK, now you’re thinking, “Alright, so Apple gets me to buy a bunch more $30 adapters so I can connect to all this different stuff.” Well, no. Apparently not. See, as far as I can tell, some of those adapters don’t exist. First of all, there is no adapter that supports DVI-I, so there’s no hope of chaining it to your old adapters (which would probably be bad for video quality at some point, but if you’re stuck between “works” and “doesn’t work” it wouldn’t be a bad fix). Also, I see no MDP-RCA adapter listed on the Apple site. There is an MDP-VGA, which I have recently purchased, which works fine for using my Samsung TV as a second monitor. I think Apple then expects you to get an adapter somewhere else that goes from VGA to RCA or S-video.

All I can say about these cables is be very careful. Apple has been bouncing around with various types of mini connectors on their laptops and desktops in recent years, so there’s a lot of Mini Displayport, Mini DVI, Mini VGA, etc.

Most of all, and I’m not sure if this is a defective product or by design, the MDP-DVI adapter I first bought does not work with my Apple Cinema Display. This is an old monitor from 2002, with an ADC connector on it, which is plugged into a KVM switch which can switch between two DVI inputs (from my PC and Mac) so I can share the screen and keyboard/mouse with two machines. It’s an unconventional setup, but the point is it receives its signal from DVI-D, it works with the other three computers in the house, and it should work. I get nothing. No indication from computer or monitor that anything is happening or plugged in. Now I have read on the reviews page for this item on the Apple site, that a number of people have purchased defective connectors of this type, and upon buying one (or sometimes more!) replacements, it suddenly worked fine. But I don’t have another DVI monitor to test with at the moment, so I have no way of knowing if it’s just a bad connector. But I intend to find out.


April 3, 2010

Son-of-a-Bitch: The PC Edition

I call this: computers,gaming,pc,tech — Posted by KP @ 5:40 am

So you know, I’m home on vacation for five lovely days.

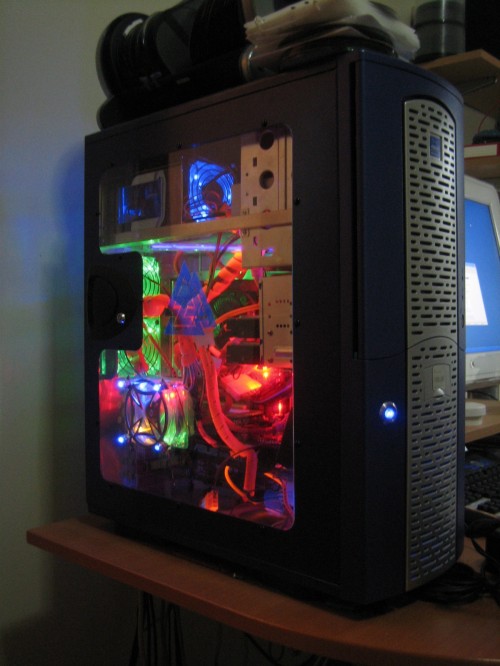
What’s the one thing I want to do on the rare occasions that I’m home? Why, play on my gaming PC, of course. It’s big and heavy and can’t go anywhere, but I’ve put a lot of money into it over the years, and sometimes I’d like to play it a little before it’s obsolete.

Well when I got home, I noticed that it was making a strange sound. It sounded to me like there was something wrong with one of the fans in the back. Upon further investigation, I realized the noise was coming out of the power supply. This got me nervous.

First of all, the PSU is one of the only original parts from when I first built it in January of 2005. I was going to replace it at the same time as the motherboard, CPU, video card, and RAM, back in 2008, but I ran out of money. It’s a 600W, which was really good at the time it was new, and when I discovered it could just barely run the more power-hungry components I was adding, I decided to stick with it until I had more time and money for an upgrade.

Sometimes it does weird things. Sometimes when the computer is off, the lights on my joystick and headset flicker. Sometimes all the case lights don’t come on. A lot of times, the light on the power button doesn’t come on. Sometimes peripherals would light up when the computer was off when they never have before. There doesn’t seem to be any logic to it.

My basic assessment of it has been, “yeah it’s sketchy, and I’d feel better with a PSU that’s really designed to handle newer parts.” But I’ve been on the road ever since the upgrade in 2008, and naturally I haven’t felt it was wise to invest in any upgrades since then, since computer parts lose their value so quickly.

So today I started to really worry about the noise. It rises and falls with the activity level of the PC (i.e. it starts or gets louder when opening or saving large files). I did some research online, and it seems like it’s fairly common in old or cheap PSUs. Something to do with the transistors getting loose. Apparently it’s not a sign that your PSU is going to explode, although the general consensus seems to be that it’s a good sign you should get a new one.

There’s also the strange fact that my TrackIR receiver for some reason stopped working while I was gone (like has no reaction at all to being plugged in, like it’s totally dead). It was one of the things that would light up for no reason when the PC was off. The other strange new behavior is that the computer will not turn on right after the switch on the back of the PSU is turned on. Based on the flickering of the lights on my peripherals (which luckily pretty much all have lights), I can see that it’s as if it’s summoning up the power to turn on over the course of a minute or so. First my headphones will flicker, then get stronger, and finally light up fully, then one side of my X52 joystick, then the other, then once both of those are lit, or at least starting to flicker, then the power button will actually succeed in turning on the computer. Scaaaary!

Oh, and also when saving the BIOS settings, instead of a restart, the computer suddenly shuts down, and again has to go through this building up of power before it will turn on.

I am beginning to seriously worry about what this unstable power might be doing to my peripherals, and if it has indeed killed my TrackIR, I don’t want to lose anything else!

While the expense of a new PSU is an inconvenience, if the damn thing does blow up in the next day-and-a-half, I can’t replace the whole computer. So as much as I want to play while I’m home, the fact is, ordering a $100 part from Newegg after the tour is over is the smarter thing to do, rather than trying to squeeze a few hours of fun out of it and frying $2000 worth of parts that I wouldn’t be able to replace for years. It would all be over — that’s it, kaput — gaming on a Macbook Pro till the end of time.

Speaking of which, those new Macbook Pros rumored to have the i7 chips still aren’t out yet. Mine is behaving lately, so I’m actually OK with the delay. I really still love this machine, although on this last leg of the tour I had some more time for gaming, and couldn’t help thinking how much better it would be with a faster CPU and more video memory.

Anyway, perhaps this unfortunate situation will cause me to spend a little less time gaming, and more time doing productive projects, like working on the database, and some expansions of the site that I’ve had in mind.


March 27, 2010

So Much Interwebs I Want to Cry

I call this: computers,gaming,tech — Posted by KP @ 9:15 am


We have been rehearsing and loading in on the campus of the University of Tennessee at Chattanooga. Yesterday in the rehearsal room we discovered that not only is the interwebs fast, it’s like insanely, inconceivably fast. This score above isn’t even as high as what we got yesterday. I don’t think I’ve ever seen so much bandwidth in my life. I don’t know what I would do with it.

I have been excited that our hotel (the Chattanooga Choo Choo) has occasional speeds over 1mbps, which is enough for gaming, and enough to make you doubly pissed when it inexplicably craps out in the middle of your gaming session.

And here we are, with more bandwidth than we have at home through the lowly cables of Time Warner, and we’re at work. Not necessarily work-ing, mind you, but it’s really hard to have a full gaming session with mouse, headset, gamepad and such when everybody else is working.

When I was in college we had dial-up. I don’t want to go back to college, I just wish I even had the option to have this much interwebs in my home.

Most of all, I’m really sick of hotels providing such crappy bandwidth, on purpose. Of course universities get tuition from their students to pay for such services, but their housing fees aren’t the equivalent of $100 per night per student. Why do I pay $100 per night in a hotel and get dial-up speeds? And my favorite is the hotels that provide crap bandwidth for free and then charge for more. Like it really costs them $12/day to provide one guest with bandwidth that you’d still say sucked if it was in your house. It’s like if warm water was free and you had to pay extra for every day you wanted hot water in your shower. Come to think of it, I hope no hotel owners are reading this, because they’d probably do it. And is the hospitality business so inherently unprofitable that buying a TV package that includes the History Channel would put half of them out of business? Apparently so.

Assholes.

Honestly, I don’t mind frequently working 18 hours a day. I don’t mind being away from friends and family for months at a time. I don’t even really mind being away from my stuff. Hotel internet is what makes touring suck.


March 11, 2010

Filemaker 11 Released

I call this: computers,tech — Posted by KP @ 8:07 am

My Twitter feed lit up the other day with news that Filemaker 11 has been released.
I use Filemaker to design a stage management database that does pretty much everything I need to do. Ever. So of course this is a big deal to me.

New Features

Charts is the one they’re really pushing in the marketing, but have you ever seen a stage management chart? I mean it would be cute if you wanted to look at trends, like have a little pie chart showing how many tickets you sold relative to capacity or something, but I don’t think a stage manager has ever needed a chart.

The two words that got my attention were “filtered portals,” which is one of those things I’m always shocked it doesn’t do already. A portal is like a window within a window, for lack of a better term, that pulls data from some other table in the database and displays it as a list. For instance, my venue information layout contains data about a single venue (name, address, union status, etc.) and within it has two portals — one for all contacts (pulled from the contacts table) that have that venue in their “company” field, and another for all performances that are listed in the event table as occurring there. So when I look at each venue, I see all the contacts associated with it, and all the performances that happen there.

However, my event table tracks rehearsals, previews and performances, which are indicated by a drop-down menu to choose which type a particular event is. Most of the time this isn’t a problem because we’re mainly doing shows, but for example at the Guthrie, we were rehearsing there for a month. If you look at the Guthrie’s venue entry, you’ll see all the rehearsals as well. There is currently no way to tell the portal “show me related records from the events table, but only the ones that have ‘Perf’ as their Type.” It seems like a really obvious feature, and one that always bugs me that it’s been missing. So for that alone I want to upgrade.

Upgrade Pricing

I have Filemaker 10. I paid $300 for it. Like six months ago. The upgrade pricing for Filemaker 11 is $179. The cost is high, but for apps like this I expect it. What makes it frustrating is that it’s $179 whether you own Filemaker 10, 9 or (for the first six months) 8. So basically there’s no incentive to upgrade to every version. Which for a large corporation is probably a good idea anyway, since changing the compatibility of your database every couple years would be a huge undertaking. But it would be nice if they threw a bone, even a small one ($20?), to people who care enough to want the extra features right away. Why are people who bought the program 5 years ago paying the same to upgrade as me who bought a version that’s only been out a year? Lame. Very lame.

Now instead of immediately hitting the “purchase” button upon the logic of “11 is better than 10” (I call this the Spinal Tap Theory of Software), I’m going to really have to look into the features to see if it’s something I will get significantly more productivity out of. And I may try to save up some Amazon gift certificates or get it for my birthday rather than buy it right away. If I didn’t need a new laptop, things would be different, but I’m being very cautious about spending any significant money until after the computer is purchased, so that I can examine how broke I am before proceeding with purchases that might become lower-priority in light of my brokeification.


January 17, 2010

Review: Altec Lansing Orbit MP3 Speaker

I call this: computers,tech — Posted by KP @ 6:08 pm

This week we had a Skype conference scheduled between our cast and the NY office.  Nick and my reaction to this was kind of like, “um… uh… OK,” cause we’re not really set up to have video conferences with 14 people on our end.  But being the technological type, we set our computers up, and reserved a good room to have the call in.  But we knew our laptop speakers would not be loud enough to let a room full of people hear well.  I travel with a cheap external speaker, but it’s barely louder than the laptop’s own, and I’ve been looking for a while for other options that are small enough to tour with.
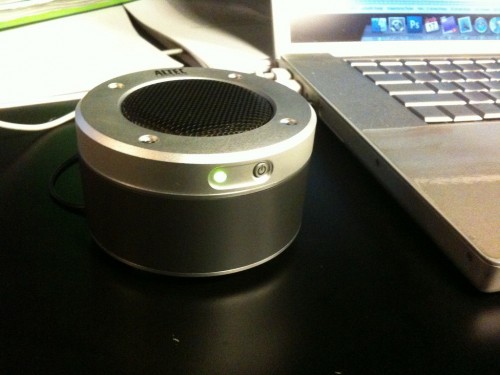

I came across the Altec Lansing Orbit MP3 speaker at the Apple Store, and took a chance on it.

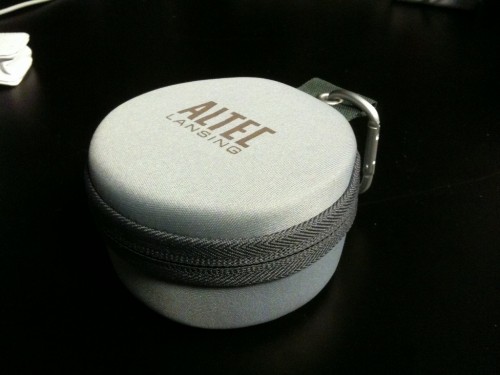
It’s about the size of a doughnut, and comes in a cute carrying case with a carabiner, so easy to travel with.  The short cord curls up under the bottom and the 1/8″ stereo mini plug snaps into place to hold it in.  The bottom also has little rubbery feet, which is nice.  The overall build quality feels very good.  It’s not lightweight for its size, but it’s also not made of cheap materials.

It’s an omnidirectional speaker, so you can place it on your desktop with the speaker pointing up, and the sound will fill the room.  The speaker takes 3 AAA batteries (included), and only works when powered.  My old speaker would produce a tiny bit of sound when unpowered, which was handy for listening without batteries to devices that don’t have their own speakers, such as older iPods and CD players.  But that’s really not something that has been an issue for me too often, so I don’t really mind losing it.  I haven’t had it long enough to get an idea of the battery life, but the power button supposedly also indicates when the battery is low.  There is no volume control on the speaker, so you must use the built-in volume on your computer or music device.

For basic tasks of making computer sound audible to a larger room, or having better sound while watching video or listening to music, I find it works very well.  I think at $40 it’s a fair price for the features, and the accessories are of surprisingly good quality.

There’s also a USB version, which is good because it doesn’t need batteries, but it’s not as flexible because it can only be used with a computer. It’s also $10 more.


December 25, 2009

Christmas Coding

I call this: computers,phones,tech — Posted by KP @ 6:59 pm

It’s been a really long time since I had the time to learn anything new about web development. The next thing on my list has been to learn more PHP so I can learn how to write scripts and generate dynamic content on the site.

I had an idea months ago for an online quiz I wanted to put on the site: I kept reading about iPhone apps where the title of the app gave little indication of what the purpose of the app was. Some of them were actually kind of funny (and by funny, of course I mean “could potentially be raunchy”). I had visions of a quiz which would present the title of an app and the user would have to guess from several descriptions of what the app was for. My only problem is that I didn’t know any programming languages to allow me to create such a quiz from scratch.

So today, Christmas Day, after a video chat with my family, I set about learning some more PHP (like all my coding knowledge, I don’t have any fancy books, I just type “php tutorial” into Google and see what comes up). I have gained some new knowledge, and I present to you:

The iPhone App Name Quiz!

Once I got used to the syntax, things came easily. Between my work on spreadsheets as part of my very nerdy involvement in the high command of Battleground Europe, and the stage management database I’ve been designing for the last four months or so, I have been spending a lot more time dealing with calculations and logic formulas. The last programming I successfully did before this year was in BASIC, back when I was in gifted camp when I was ten, so I am happy to find that my brain is retaining things and having an easier time working with concepts like if/then/else statements.

I’m not sure what else I’ll want to do with this newfound knowledge, but now I will have one more trick up my sleeve while adding to the site.


December 24, 2009

The Deadliest Catch

I call this: computers,mac,On the Road Again — Posted by KP @ 8:53 pm

or
“What Happened to Your Laptop?”

deadliestcatch
Entertain conjecture of a time in which I’m on the road with Henry V. We have just concluded our very successful run in New York, and have set out on the next leg of the tour. When our story begins, we’re in Nashville. We have arrived there the day before, after a layover in DC, to board our buses to go the rest of the way to our first performance at Mississippi State. No one understands how it could possibly have been cheaper or more efficient to do it this way, but nevertheless that’s why we were in Nashville.

After we spent the night for (as far as we can tell) no particular reason in a Nashville hotel, the cast departed in the afternoon and the crew was given the entire day to hang out in Nashville while our driver slept, as we would be leaving around midnight and sleeping on the ride down.

It wasn’t all that exciting, as the crew had actually been to Nashville earlier in the tour, because our bus’ water pump was broken and we had an extra day between shows, so we took a detour. While the bus was being repaired we ate ribs, listened to the live bands on Broadway, bought cowboy boots, ate way too much, and did all the things one does in Nashville. So for our second visit, we had lunch at a nice outdoor place we had visited the first time, researched potential sushi restaurants for dinner, and otherwise just kind of hung out on the bus watching TV.

Somewhere in the course of watching TV is where things get interesting.

Now I must introduce Daphne. Daphne was our props supervisor. We must have been watching the Discovery Channel, and it was at this point that Daphne realized that the season premiere of Deadliest Catch was coming up, and that we would be in the middle of our first performance in Mississippi while it was airing. My assistant Nick, who you have already met, was also disturbed when this was brought to his attention. Apparently Nick and Daphne really like Deadliest Catch.

It was something of an urban legend that the bus had a DVR. The satellite remote had buttons that referred to it, but when we tried to program the show to record, it became obvious that we were missing something that would allow that to happen, as it could be programmed, but nothing would happen. This was also one of our first experiences with our new bus, which we would later come to realize sucked in every imaginable way. Maybe the original bus had a working DVR, but this one didn’t appear to be fully equipped.

This minor setback was not going to dissuade us, however. We would just have to go a little low-tech. The bus had a VCR, we reasoned. All we have to do is find a place that sells VHS tapes and we can record it the old-fashioned way.

On our way to our sushi dinner, we passed a drug store. Daphne went in, and a few minutes later happily emerged with a set of three VHS tapes.

When we got back to the bus, we naturally set about doing a test run and trying to record a show. What we found was that the VCR apparently could play tapes, but the satellite connection didn’t pass through it, so it couldn’t record anything. This was very annoying! But given that all these electronics are mounted behind panels and on opposite sides of the lounge from each other, we didn’t feel comfortable tearing the whole bus apart to get at the wiring. We accepted defeat, and the VHS tapes were stacked on the kitchen counter.

Fast-forward a few days. My laptop was having battery issues, so after using it in the front lounge after the show, I set it down on the couch where I had been sitting, and left it to charge overnight.

It’s now the middle of the night. All of the crew are asleep in their beds. We encounter some bumpy and/or hilly roads. At some point in the night, a clattering is heard from the kitchen. This isn’t really unusual. Somebody’s coffee container or soda bottle is usually falling off the counter in the night. I, having the bunk on the other side of the kitchen wall, remember hearing this and thinking that it didn’t sound like anything breakable or containing liquid, so I didn’t even really wake up.

In the morning I was alarmed to find my laptop had 3 black smudges on it. I wasn’t concerned about smudges but at first I couldn’t tell if they were smudges or dents. I frantically rubbed on them, and thankfully the black marks came off. Two of them left no sign, but the largest of them revealed a dent in the aluminum cover of the laptop! I was totally confused about how this had happened, until we started to look at the forensic evidence. On the couch, laying casually, were the three VHS tapes. They looked like they had just been tossed there from when we were trying to get the VCR to work, until someone remembered that they had been stacked on the kitchen counter, and most of us had heard the crash from the kitchen during the night. So I went back to the tapes, and sure enough, each of them had a corner bashed in, where their black plastic had been worn off.

And that solved the mystery of how Daphne and Nick’s love for The Deadliest Catch dented my laptop.

The afterword to this story is that whenever I open my laptop I am reminded of Daphne and Nick, and how badly they wanted to see The Deadliest Catch. They never did get to see that episode. I’m not sure if they’ve seen it in reruns yet. I still have never seen an episode, but I am very curious to see what’s so special to have created such a fervor on our bus. And that’s the story of what happened to my laptop.


Overdue Back-to-Tour Shopping Post

I call this: computers,mac,On the Road Again,theatre — Posted by KP @ 4:56 pm

I ordered a lot of supplies before going on the road. Here’s a run-down.

Business Cards

With this tour I’m switching to using my @headsetchatter.com email address for business and personal use. Naturally I needed new cards. I was going to do new cards anyway because my old ones were designed to match the Go Button site and logo, and I wanted to use the HeadsetChatter site colors and logo as a kind of personal branding.

Once again I ordered the premium business cards from VistaPrint, which are more expensive because they have full graphic images on front and back, and these even more so because I added a foil effect, which looks really cool.
cards

Composite-Toed Shoes

I bought a pair of Sketchers steel-toed shoes about five years ago. They’re sneaker-like, but very heavy and uncomfortable. So heavy that sometimes if I wear them too much they start to hurt my leg muscles in uncomfortable ways because I’m not used to having to work so hard to pick my feet up. I only wear them in very rare cases, where I’m working in a theatre while the set is really still under construction.

Last year on tour, our props supervisor, Daphne, was the only one of the three of us who loaded the nose of the truck who wore safety shoes, so she was the designated person who would kick the scenery into places where it didn’t want to go. On one of our long nights in the truck, I asked her how she liked her shoes, and expressed how I never wore mine because they were so heavy. She informed me that her shoes aren’t steel, and aren’t heavy. At some point, hopefully back on the bus, and not on the truck, she took one off and let me see how light they are. At that point I decided it was something to look into if I returned.

The pair I found are made by Converse, and are a little heavier than Daphne’s, but I think most of the weight is in the heavy rubber sole, not from the toe cap. I wear very lightweight Puma running shoes normally, so the contrast is especially large for me when I switch to the boots. They have an air bubble in the heel, which also helps to make them feel more supportive and sneaker-like. The site where I got them, Steel-Toe-Shoes.com, had some options that really look just like regular sneakers, but I decided to play it safe and go with black, in case I need to wear them for performances. My philosophy about that is that if I am at the stage of production where I need to wear black, and still need to wear safety shoes, something is really wrong. But it’s always good to be safe.
Converse-Composite-Toe-Boots-C4555L
When I had to reduce weight and bulk from my suitcase, they were the obvious thing to cut, but I held onto them, and I’m so glad. As it turns out, I have worn them almost every day. Not because things have been getting dropped on my feet, but because of the snow. Pumas, it turns out, do not make good snow shoes. These are relatively heavy, and my feet get kind of clammy compared to the breathable sneakers I tend to wear, but in the snow the warmth is very welcome, and the thick materials and high-top design gives me a little more confidence about slipping on the ice.

Work Gloves

Last year I did load outs with my leather winter gloves. First of all, it roughed up my gloves pretty bad. And then when it was like 70 degrees, it was really lame to be wearing winter gloves. So then us ladies on the tour all bought weightlifting gloves, because they were made small enough for us and padded, but offered no finger protection. This year I vowed to find serious work gloves that fit properly.

Apparently in order to find serious work gloves for women you have to be willing to buy things marketed as “gardening gloves,” but these gloves by Youngstown Glove Co. are very comfortable, and in my limited amount of frozen-truck-work, they felt great.
41wFSmdp3YL._SL500_AA280_

Hard Drive Upgrade

Maybe surprisingly, this is the only computer upgrade. I have been planning this since I bought my Macbook Pro two and a half years ago. For various reasons of time, place and money, I’ve put it off, but this was the time.

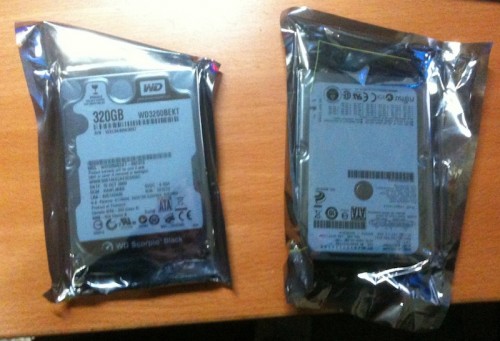
I bought a 320GB 7,200rpm drive from Western Digital which will is my new internal drive. I haven’t noticed a significant decrease in battery life, although I do hear the fans running a lot more, and the drive itself sometimes vibrates so much at random times that when I have my phone next to the computer, I think my phone is ringing.
IMG_0981

I also got a 500GB 5,400rpm drive from Fujitsu (my new secondary Brand I Trust since I can’t believe how well the original drive in the MBP did). This will be my external Time Machine backup drive. As is my style, it’s a 2.5″ laptop drive so that it also serves as an emergency replacement should my internal drive go kaput.

IMG_0979

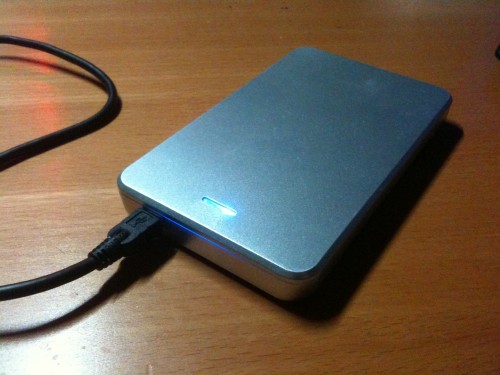
I ordered these from Newegg, which is pretty much the most reliable seller of anything on all the web, so far as I’m concerned. However, I also wanted two drive enclosures to put the outgoing 160GB drives in, and none of the ones on Newegg filled me with confidence or floated my boat. For that it was back to Other World Computing (macsales.com), who sell the enclosure I currently use and love, and will continue to use.

I was looking for one or two cheaper USB enclosures just to have around, so I wouldn’t have to swap out to use my spare drives. The one I found was so nice, small and so cheap ($20) that I bought two. I ended up bringing one of the old drives on the road with a few seasons of The West Wing and The X-Files on them for entertainment. Just a word about these: they look cool, they match the Mac product line, but they are plastic, not aluminum. They’re $20, and there’s a reason they’re $20. But for a cheap enclosure, they do the job and look good doing it.

IMG_1001

The reasoning behind this upgrade is that I’ve always wanted a faster internal drive, and I’ve got 4 frickin gigs of RAM and rarely feel it, and I was sure that the drive speed is the bottleneck. I’m not a big one for benchmarks, but I will say that since the upgrade I have yet to stare at the spinning beachball of death and wonder what the hell is taking so long.

Also I needed a larger Time Machine drive. The reason both my drives were 160GB is because I bought the backup drive before Time Machine existed, and I was doing exact clones for backup. Naturally if you’re just cloning your drive, you don’t need a bigger drive than the one you’re backing up.

Before the upgrade my Time Machine backups went back about four months. In October I discovered a couple songs missing from my iTunes library. I know I listened to them over the summer, but my backups only went back to July and they weren’t there. I have no idea where they went or why, but they’ve been gone long enough to have outdone the mighty Time Machine. This event had nothing to do with my decision, but it’s a very good illustration of why your Time Machine drive should be as big as possible.

Winter Coat

Screen shot 2009-11-14 at 10.17.48 PMWhat I wanted for Christmas from my family was a new winter coat to get me through December and January in Minneapolis. It had to be super-warm for the weather there, and yet light and flexible enough that I could do load-outs wearing it if the weather was really bad. At my mom’s suggestion, I looked at the offerings from Eddie Bauer, and decided on this one. It’s awesome. I have yet to really be cold in any part of my body covered by the coat.


November 26, 2009

Rorscharch Test

I call this: computers,gaming,mac,On the Road Again,tech,theatre — Posted by KP @ 4:30 am

Screen shot 2009-11-26 at 3.10.52 AM

What does this look like to you?

If you said Luigi driving a Model T, you may be an 80s gamer.

What is it really?
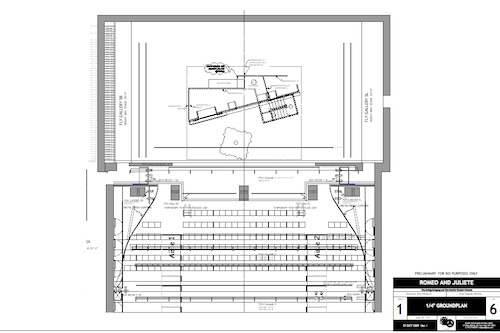
It’s the desktop icon of a PDF with all the plans for Romeo and Juliet. By default on a Mac the icon is a miniaturized version of whatever the front page of the document is.

So is our production set in the Mushroom Kingdom in the early 1900s?
Well no, now that you mention it, I’m kind of disappointed that it’s not.

Here’s a bigger version of how that image got to look like Luigi behind the wheel of a car:

Screen shot 2009-11-26 at 3.15.12 AM

It’s been driving me crazy all day. I keep wondering what that icon on my desktop that so clearly is Luigi driving a car is doing there, when I’m trying to keep only things work-related in front of me. Finally I looked at it and actually realized that what I’m looking at is the Guthrie’s McGuire stage and our set being scaled down to approximately 1/1680th of its actual size.
(disclaimer: I suck at math. I really suck at math. And I don’t have the scale drawings with me).


November 9, 2009

Razer Megalodon Review

I call this: computers,gaming,pc,tech — Posted by KP @ 10:18 pm

razer_megalodonI had been saving up for months so that I could get this headset before going back on the road. Why, you ask? Well for one thing, my surround headset of choice, the Medusa, was a 5.1 surround headset with analog connections — meaning it plugs into the audio out ports of your sound card, or for that matter, any regular audio equipment that accepts stereo mini plugs. I liked this option at the time because it’s compatible with all audio equipment and allows your sound card to do the heavy lifting, which is what it’s there for, after all. The other option, which the Medusa also offers, is to get it with a USB connector, in which case your computer has to figure out how the surround sounds should be sent out to your hardware, creating extra processing work. And of course, you can’t plug a USB connector into your stereo or TV. At least you couldn’t back then, what do I know about these newfangled TVs and stereos?

Then something happened that changed my mind: I started spending way more time away from home than at home, and suddenly my big fancy gaming PC was collecting dust, and I had to cobble together a way to make my laptop satisfying for gaming long-term.

My immediate solution was to connect the Medusa with its analog connections as a stereo headset to my Macbook Pro. First of all, you immediately lose the point of having such a nice headset, because the laptop (or most laptops for that matter) don’t support analog surround sound. So it’s just a really expensive stereo headset with a mic. Oh, and about the mic — the Macbook Pro’s audio-in jack is line-level, it doesn’t support unpowered mics, so you need Griffin’s iMic USB adapter or something similar. It’s a lot of crap to carry around, with no better performance than a cheap $15 USB headset from Radio Shack.

So this past summer, I bought a cheap $15 Radio Shack headset, just to carry to the theatre, and laughed when the guys I play online with said I sounded much better than on my old ($125) headset.

But the true problem I was having with life on the road was the lack of surround sound. The game I play, Battleground Europe, is very audio-dependent if you want to survive for long as infantry, and playing in stereo basically means spinning in circles to figure out where a sound is coming from based on where it sounds loudest. The way I was used to playing is that I could hear a single rifle shot and know if it was friendly or enemy, almost an exact direction, and an approximate distance. With one shot I would know exactly where the enemy was, and could turn right to him and shoot back, or move quickly to flank around him if he wasn’t visible. With stereo headphones that’s not possible at all. So I realized that the circumstances of my life required that I would need a USB headset if I ever hoped to play with surround.

It was around this time that Razer released the Megalodon — a 7.1 surround headset, powered by USB, and featuring a nice control box that allows you to adjust volume and a number of other features with just a few buttons.

I saved up all summer, and purchased it in the fall to prepare for going on the road. And now I’ve used it enough to answer all your burning questions.

Wait – first of all, what is a Megalodon?

Razer likes to name their products after fearsome animals. Sort of like how the Navy names different classes of ships after states, presidents, etc., Razer also has naming conventions. Mice are always snakes, for instance (see my review of the Mamba). Well headsets are… fish. Usually bad-ass fish. Cause nobody wants to brag about how they’re gonna frag your ass with their Goldfish.

The megalodon is a shark (thank you, Wikipedia). As you might have guessed from the name, which sounds kind of like it means “big-ass dinosaur,” it’s a prehistoric shark, a friggin’ huge prehistoric shark, which is estimated to have been up to 56ft in length.

Here’s a dude sitting in one’s mouth. RAAAAWWRR!!
585px-Carcharodon_megalodon

Are you gonna review this thing or not?

Hold your horses, you’re gonna get some educatin’ with your gaming peripheral review. OK, now I’m ready.

Setup

The Megalodon connects to your computer with a simple USB plug. According to the specs it does not require USB 2.0, but a powered USB port is recommended. I tried it in my keyboard USB port (which is USB 1.1 and connected through a hub), and it was none too happy.

You don’t have to install any drivers, they are built into the control box and will automatically configure whatever computer you plug it into. Nice, huh?

Because the headphones are USB, they don’t require a sound card, which is good if you’ve got crappy sound in your rig or laptop, or bad if you’ve got a really expensive sound card waiting to be used.

The Control Box

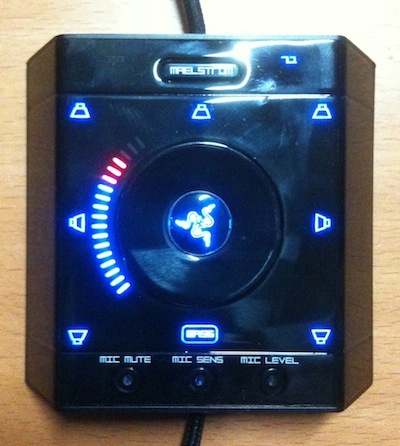
About four feet down the braided-fiber-covered cable from the headset is the control box, which looks kind of like an iPod that’s been attacked by a gaming device. It has a scroll wheel (which actually turns like ye olde iPode, it’s not touch-sensitive). In the center is the Select button, with a nice light-up Razer logo on it.

mega_control

On the left side is a volume meter which indicates different things depending on what mode it’s in, but usually it’s just your plain old volume.

At the top is a button that says Maelstrom. That’s Razer’s name for the technology that processes the 7.1 surround sound. You can push that button to toggle between 2.0 (stereo) and 7.1 mode, and the appropriate number will light up in blue on the left or right of the button. It will also cause the speaker icons around the box to light up, to show all seven speakers, or just the two at the top. Razer recommends listening to stereo sources in 2.0 mode, because the Maelstrom engine is apparently not helpful unless your source is 5.1 or 7.1 surround, and will just make it sound kind of funny.

There are three buttons on the bottom of the scroll wheel, all of which are mic-related:

  • Mic mute — mutes the mic, of course, and also lights up red when activated, so hopefully you’ll notice that you’re muted and not talk to yourself for 10 minutes like one of my squad leaders is fond of doing
  • Mic sens — while this button is pressed you can use the scroll wheel to adjust the mic’s sensitivity (shown on the volume meter)
  • Mic level — adjusts the volume of your mic’s output

The nice thing about these features is that when they are activated you can hear yourself in the earphones, so you can check right away how it sounds (in the business this is called sidetone, which is one of those terms that makes me feel really smart when I use it to explain what’s wrong with my comm).

Other Features

If you press the center button it will highlight each set of speakers on the control box and let you adjust their relative levels. You can’t independently set levels for left and right, only for each type: center, front, middle, rear, and bass.

There’s also a hidden, undocumented setting where you hold something while pressing something else. I can’t remember what it does, though. But when I find it I’ll add it.

These are all you get — there is no software to install, which also means no control over the finer points of your audio experience. They plug in and they work. I find that really great for being on the road, but it’s a little unnerving as a PC gamer geek. However, I have never felt a strong desire to tinker with the settings, which is more than I can say for the Medusa, which was mostly a product of my sound card (SB Audigy 2ZS) flipping the hell out every time I changed video drivers.

The Hardware

The main difference between these headphones and the Medusa (well basically between the Medusa and any other gaming headphones I know of) is that the Medusa creates surround sound by actually having three separate speakers in each earpiece. Most other headsets use software to figure out how to balance each sound to trick your ear into perceiving its correct direction. I thought the Medusas were pretty amazing, but the Megalodon does a nice job of indicating direction, too.

The first thing I really like about these, especially for travel purposes, is that they’re very light. They look just as bulky, but the materials are very lightweight. If you have an unruly child, or perhaps just like slamming your headset on your desk when you get killed in particularly inglorious fashion, I’d wager they won’t hold up nearly as well. But if you can be a civilized gamer, the build quality seems good, if a little more delicate.

The mic is a single piece of plastic, it doesn’t bend into position. It has a little bit of flexibility in the middle, though I don’t think that allows you to keep the shape you want, it just bends enough so it doesn’t snap accidentally. My professional feeling on headset mic booms, if you really want to know, is that I prefer the ones you can bend into any shape… until they get worn out and won’t stay where you put them. The nice thing about the solid ones is that when you put them somewhere, you can trust that they’re still there the next time you have to call a cue. And I feel the same way about gaming headsets.

The headset seems to shrink down to a pretty small size for an adult head, and expands quite a bit. I don’t know how it would do with a little kid, as thankfully I don’t have any kids here to test with, so I think you’ll have to look elsewhere for opinions if you’re a really cool and/or crazy parent to buy your small child a $150 headset.

The velvet ear pads are very comfortable. The headphones don’t block out outside noise particularly well, but that’s not always a bad thing.

Accessories

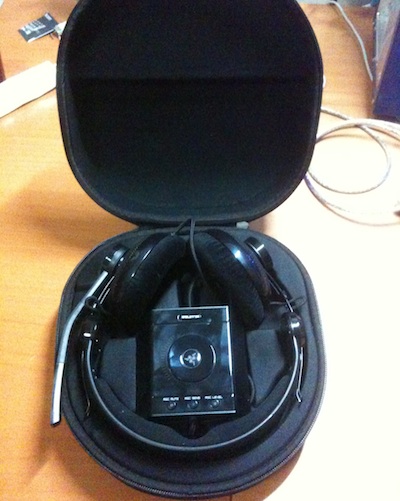
One of the coolest things about this headset, that caught me completely by surprise when I opened it, is the carrying case it comes with. It has a semi-hard shell, molded to fit the headset and control box on the inside, which closes with a zipper, clam-shell style. If you stomped on it, bad things might happen, but it will definitely keep your headset safe in most travel situations, and like the headset itself, is surprisingly lightweight, so there’s no reason not to use it. I can’t wait to go on the road with this thing. I will feel better about traveling with my expensive headset, and will know that the cord won’t be getting all tangled up in my pajamas. Getting pajamas at gametime or headset at bedtime is not productive. It’s going to be a very clear distinction from now on.

mega_case

My rough scientific analysis which consisted of me stepping on a scale both holding and not-holding the case with headset in it puts its total weight at 1.5lbs. I’ve probably told you I obsess over the weight of my suitcase, so this is very good news. Incidentally, the Medusa weighs 1lb, without a case or control box.

Does it work with Mac?

appleRazer’s official answer on this is kind of, “um, maybe, we think, but we’re not sure.” What I can tell you is that you can definitely plug them in and listen to regular audio with them (you have to select them in your audio settings to make the headphones and mic the active input and output). I don’t have any surround games to play with on the Mac end right now, but on listening to a few minutes of a 5.1 DVD, it certainly sounded like it was working. Which pretty much convinced me that that’s the only way I can ever listen to a DVD on my Mac again.

Does it work with TrackIR’s TrackClip Pro?

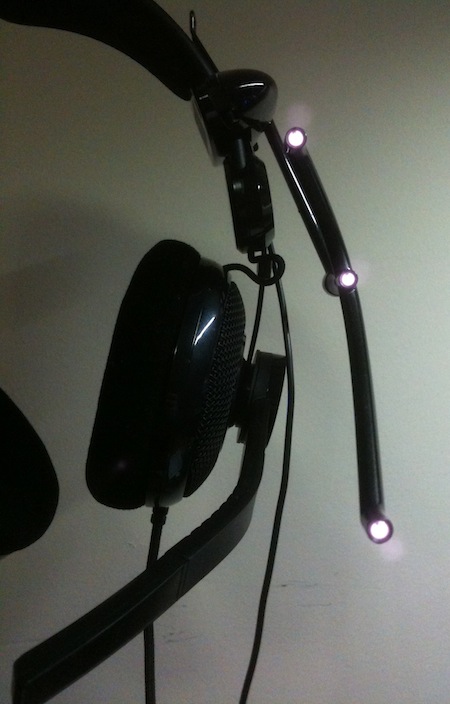
Yes. The TrackClip Pro clips rather nicely to the headband, as shown here.

mega_trackir

Summary

Pros

  • light weight
  • simple, literally plug-and-play setup
  • awesome carrying case
  • comfortable fit
  • no soundcard required
  • easy access to volume and mic settings
  • shape is compatible with TrackIR TrackClip Pro

Cons

  • no detailed software configuration possible
  • control box adds bulk compared to simpler alternatives
  • I wish there was a simple audio out jack on the control box so I could plug in external speakers or otherwise get sound out besides using the headphones.
  • not compatible with standard audio equipment, or console gaming systems

Overall I’m very happy with it. There’s not much to play with, but I think especially on the road that will be very good. I don’t have a lot of time to play, and if I’m in a hotel at all it’s generally a new one every night. Being able to take the headset out of the bag and plug it in without worrying any more about it for the rest of the night is just what I need.

Alternatives

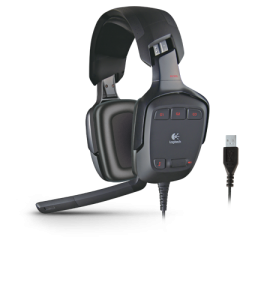
If the lack of software controls bothers you, there is also the Logitech G35 7.1 headset which has its own control panel and apparently some nice features. Before you get all excited, I will leave you with a picture of what it looks like:
17299.1.0


« Newer PostsOlder Posts »